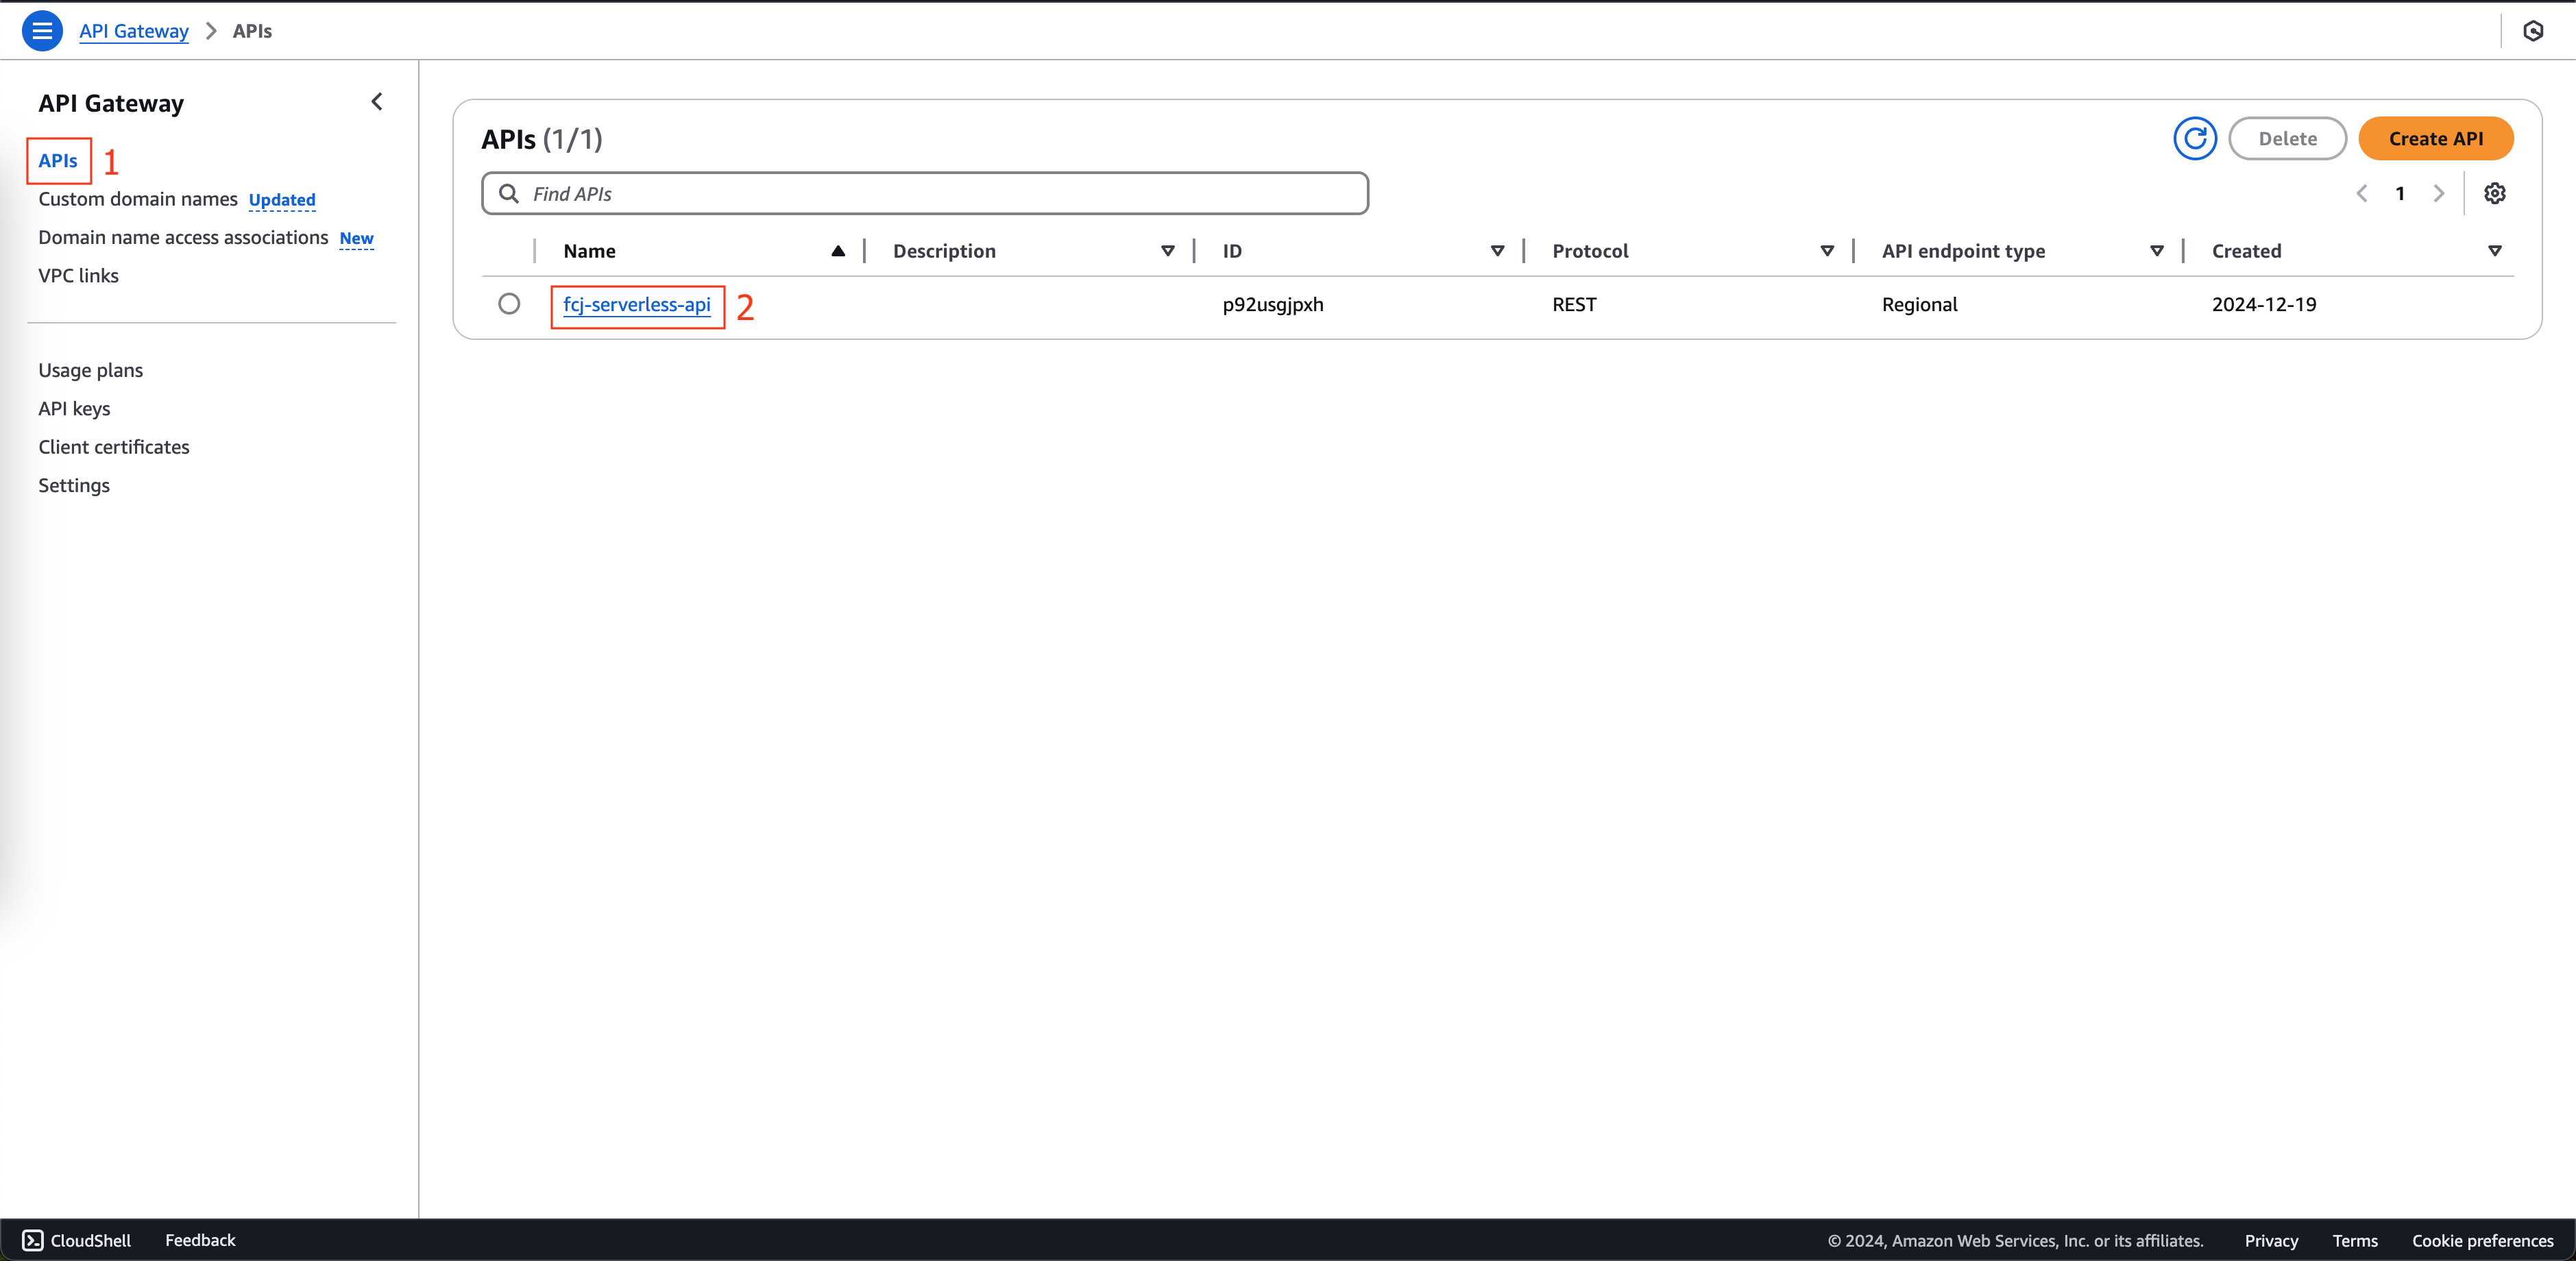
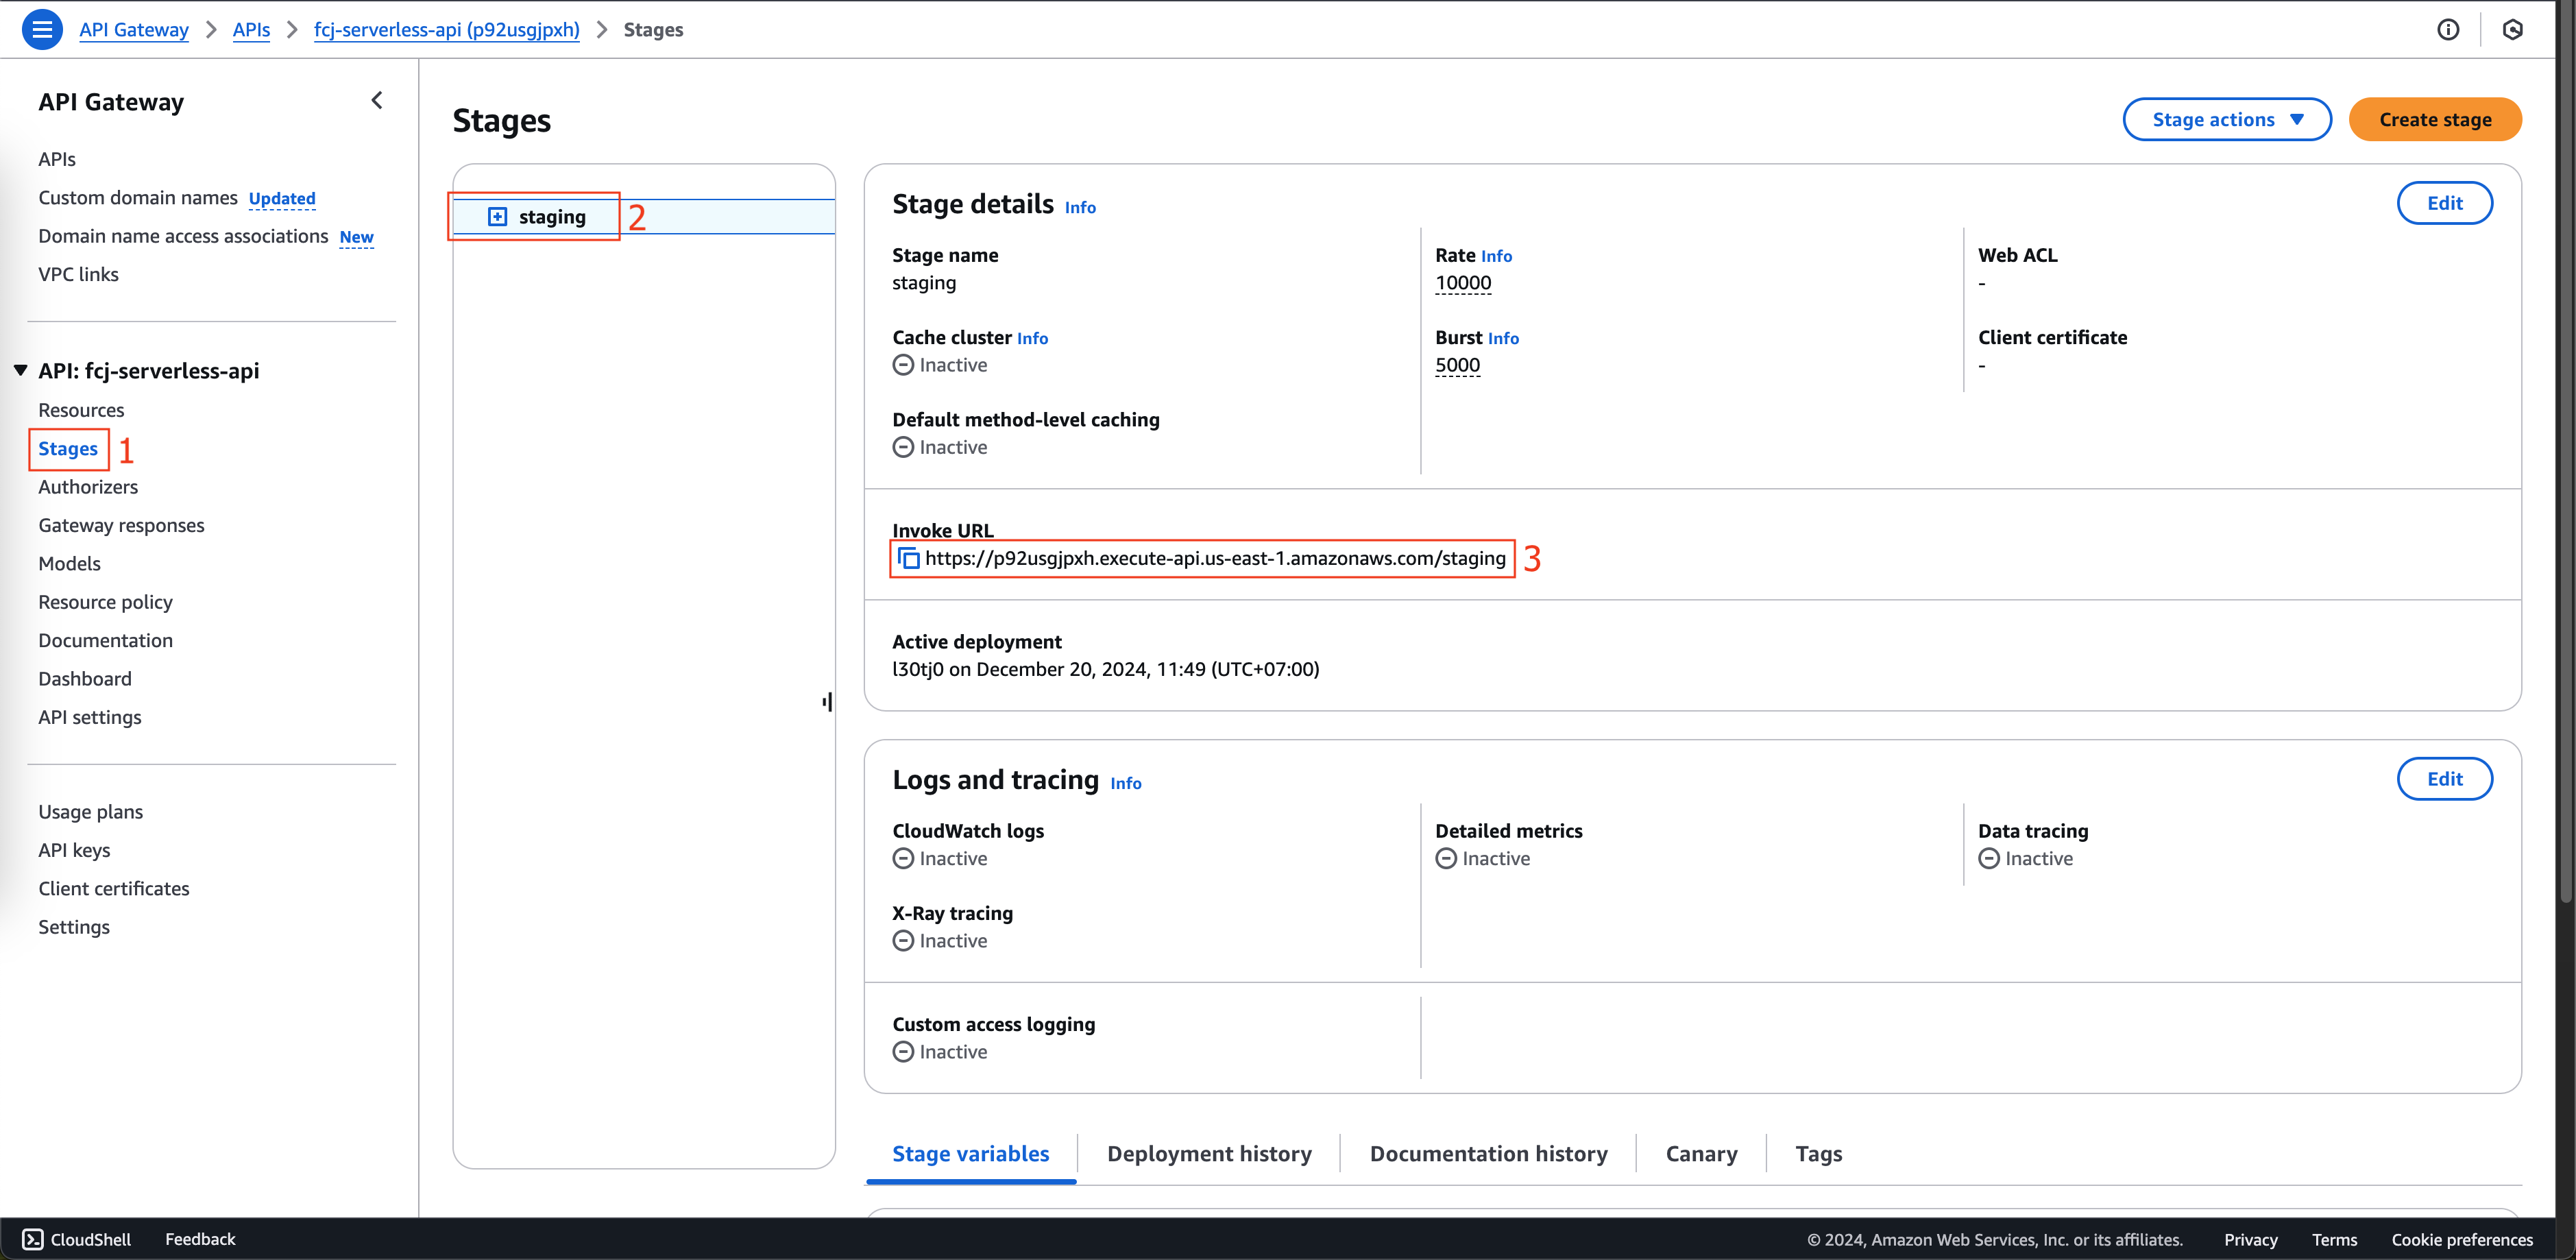
Test web operation

You can download the image files here to add data to check the operation of the services

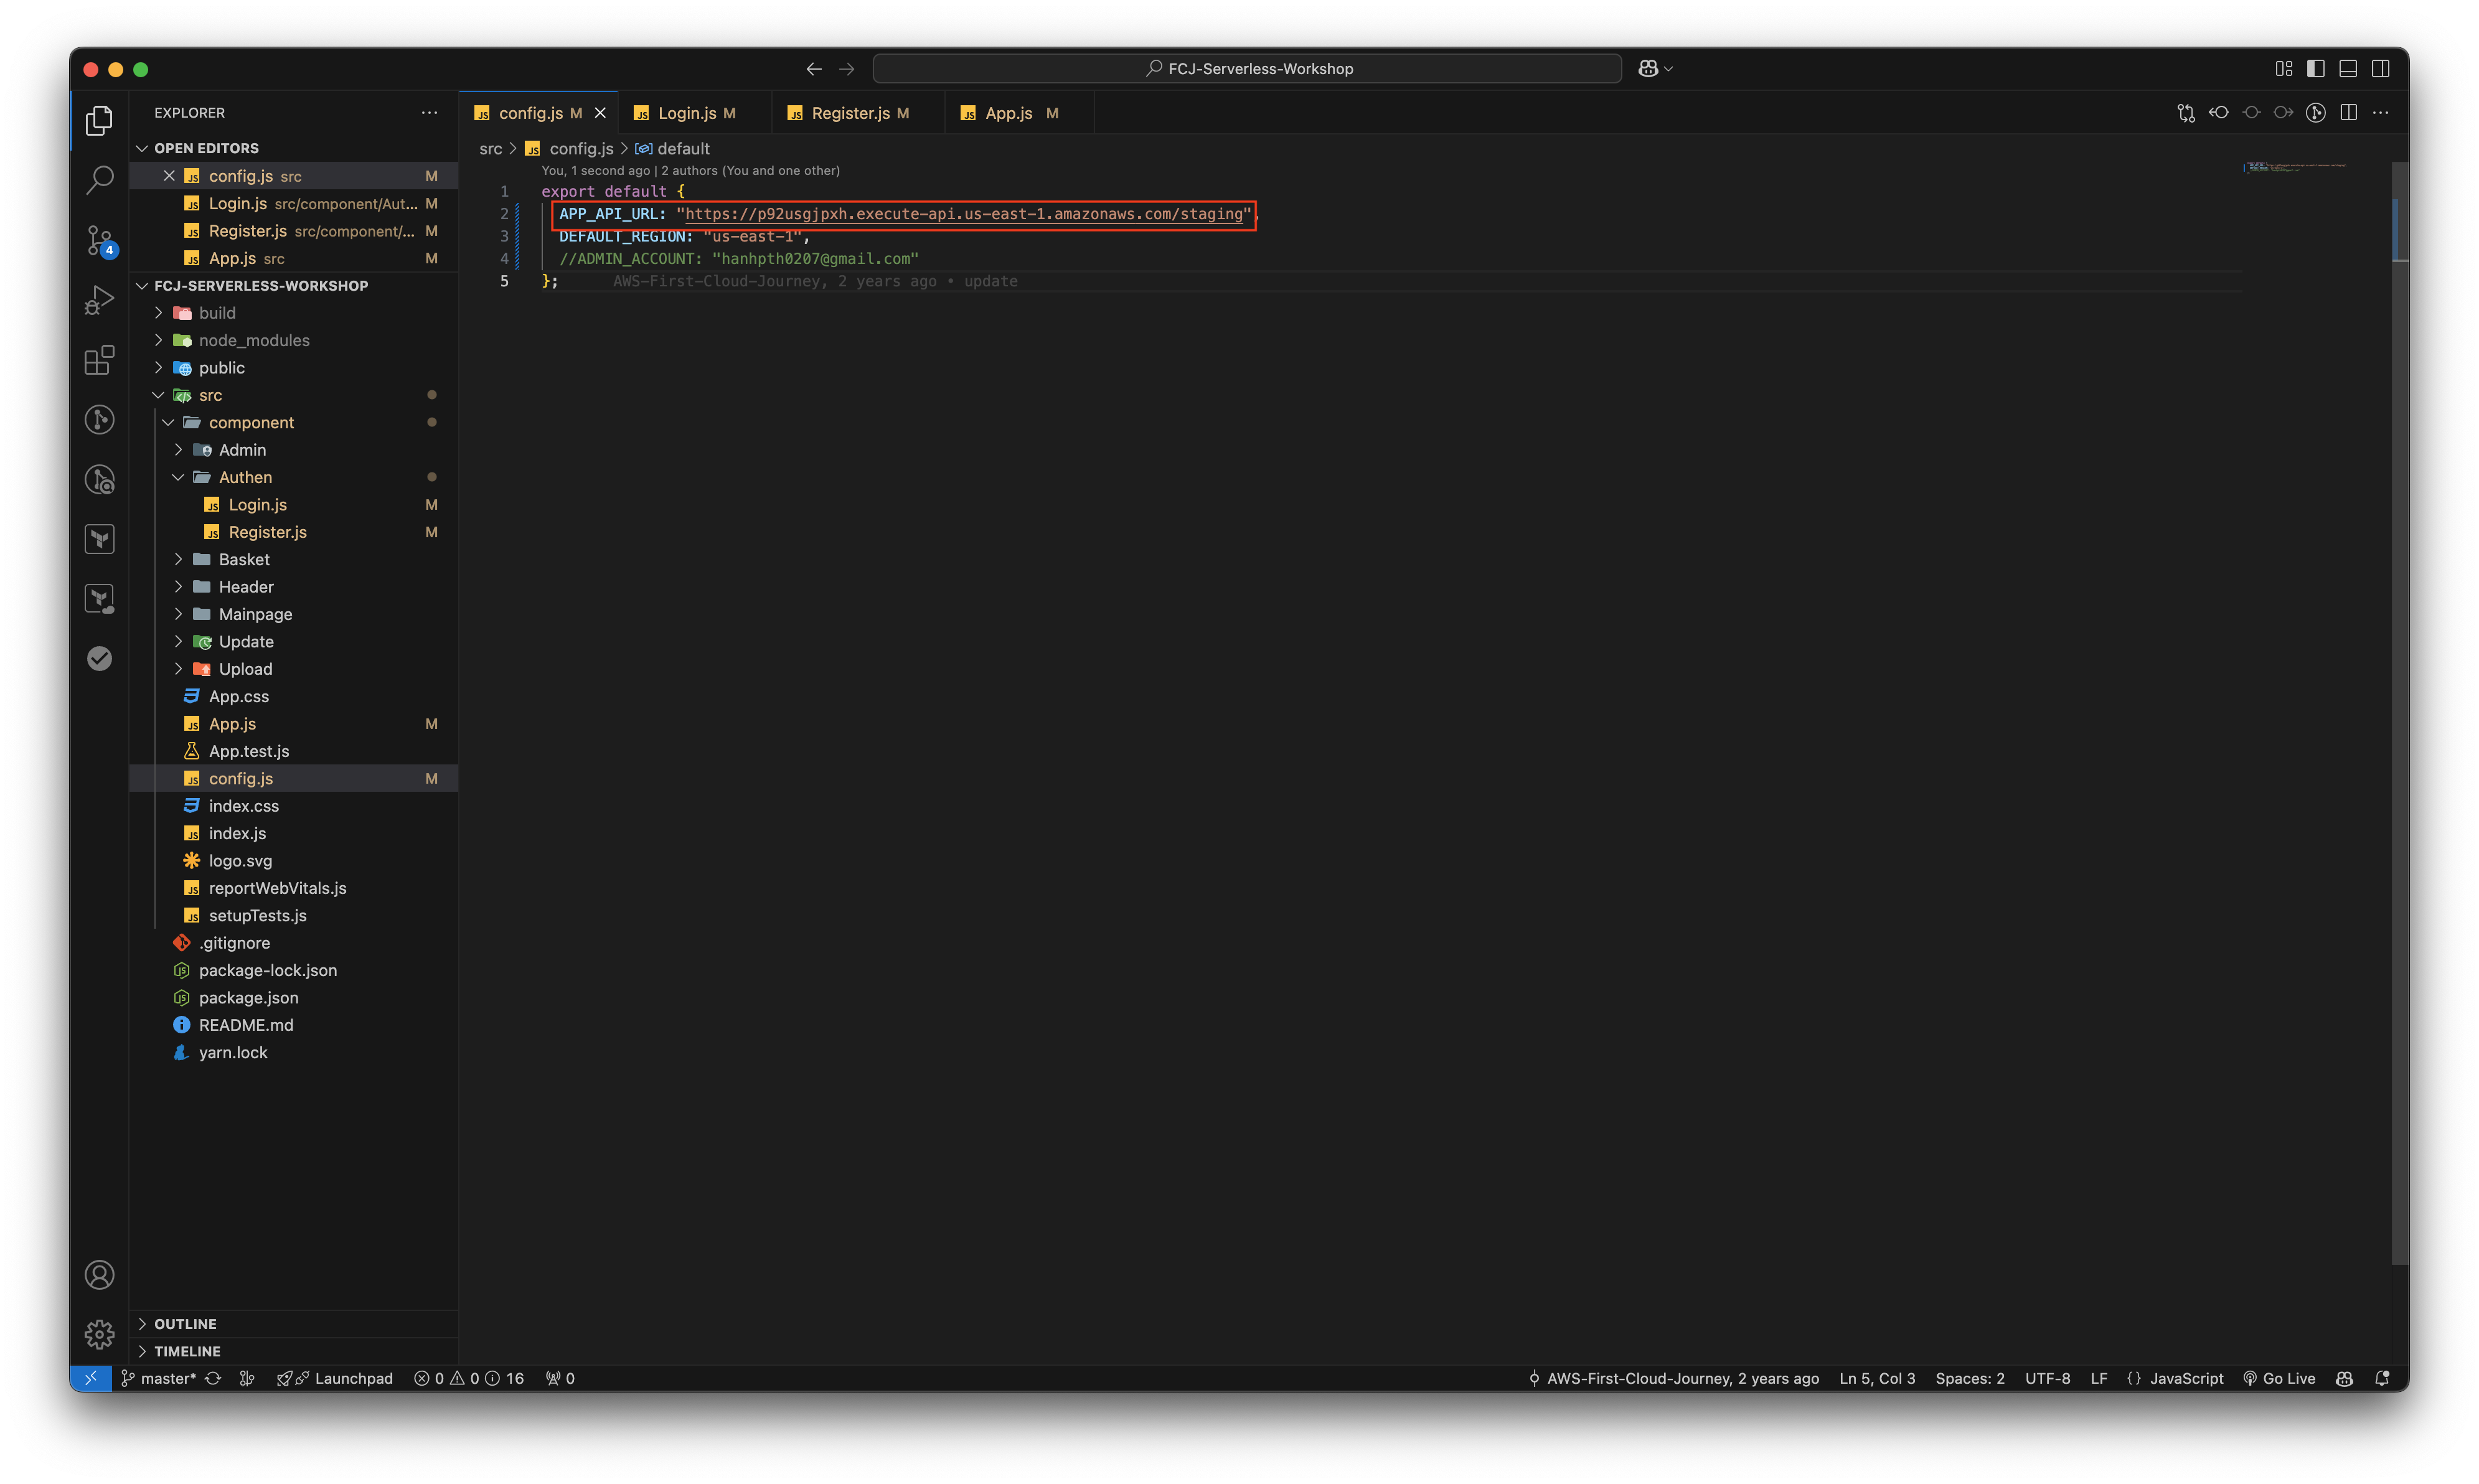
  1. Open config.js file in source code folder of front-end
  • Uncomment the line 4, then change value with email that you registered account as well as registered to receive notify

UpdateSource

  1. Open Login.js file in source/component/Authen/ folder
  • Uncomment the lines 39 and 41

UpdateSource

  1. Run the below command to build and upload to S3 bucket
yarn build
aws s3 cp build s3://fcj-book-store --recursive
  1. Navigate Amazon S3 console
  • Click to fcj-book-store bucket

AccessWeb

  1. Click Properties tab

AccessWeb

  • Scroll down to bottom, click to website endpoint

AccessWeb

  1. Click Login

Login

  1. Nhập thông tin tài khoản bạn đã đăng ký: email và mật khẩu
  • Click Submit

Login

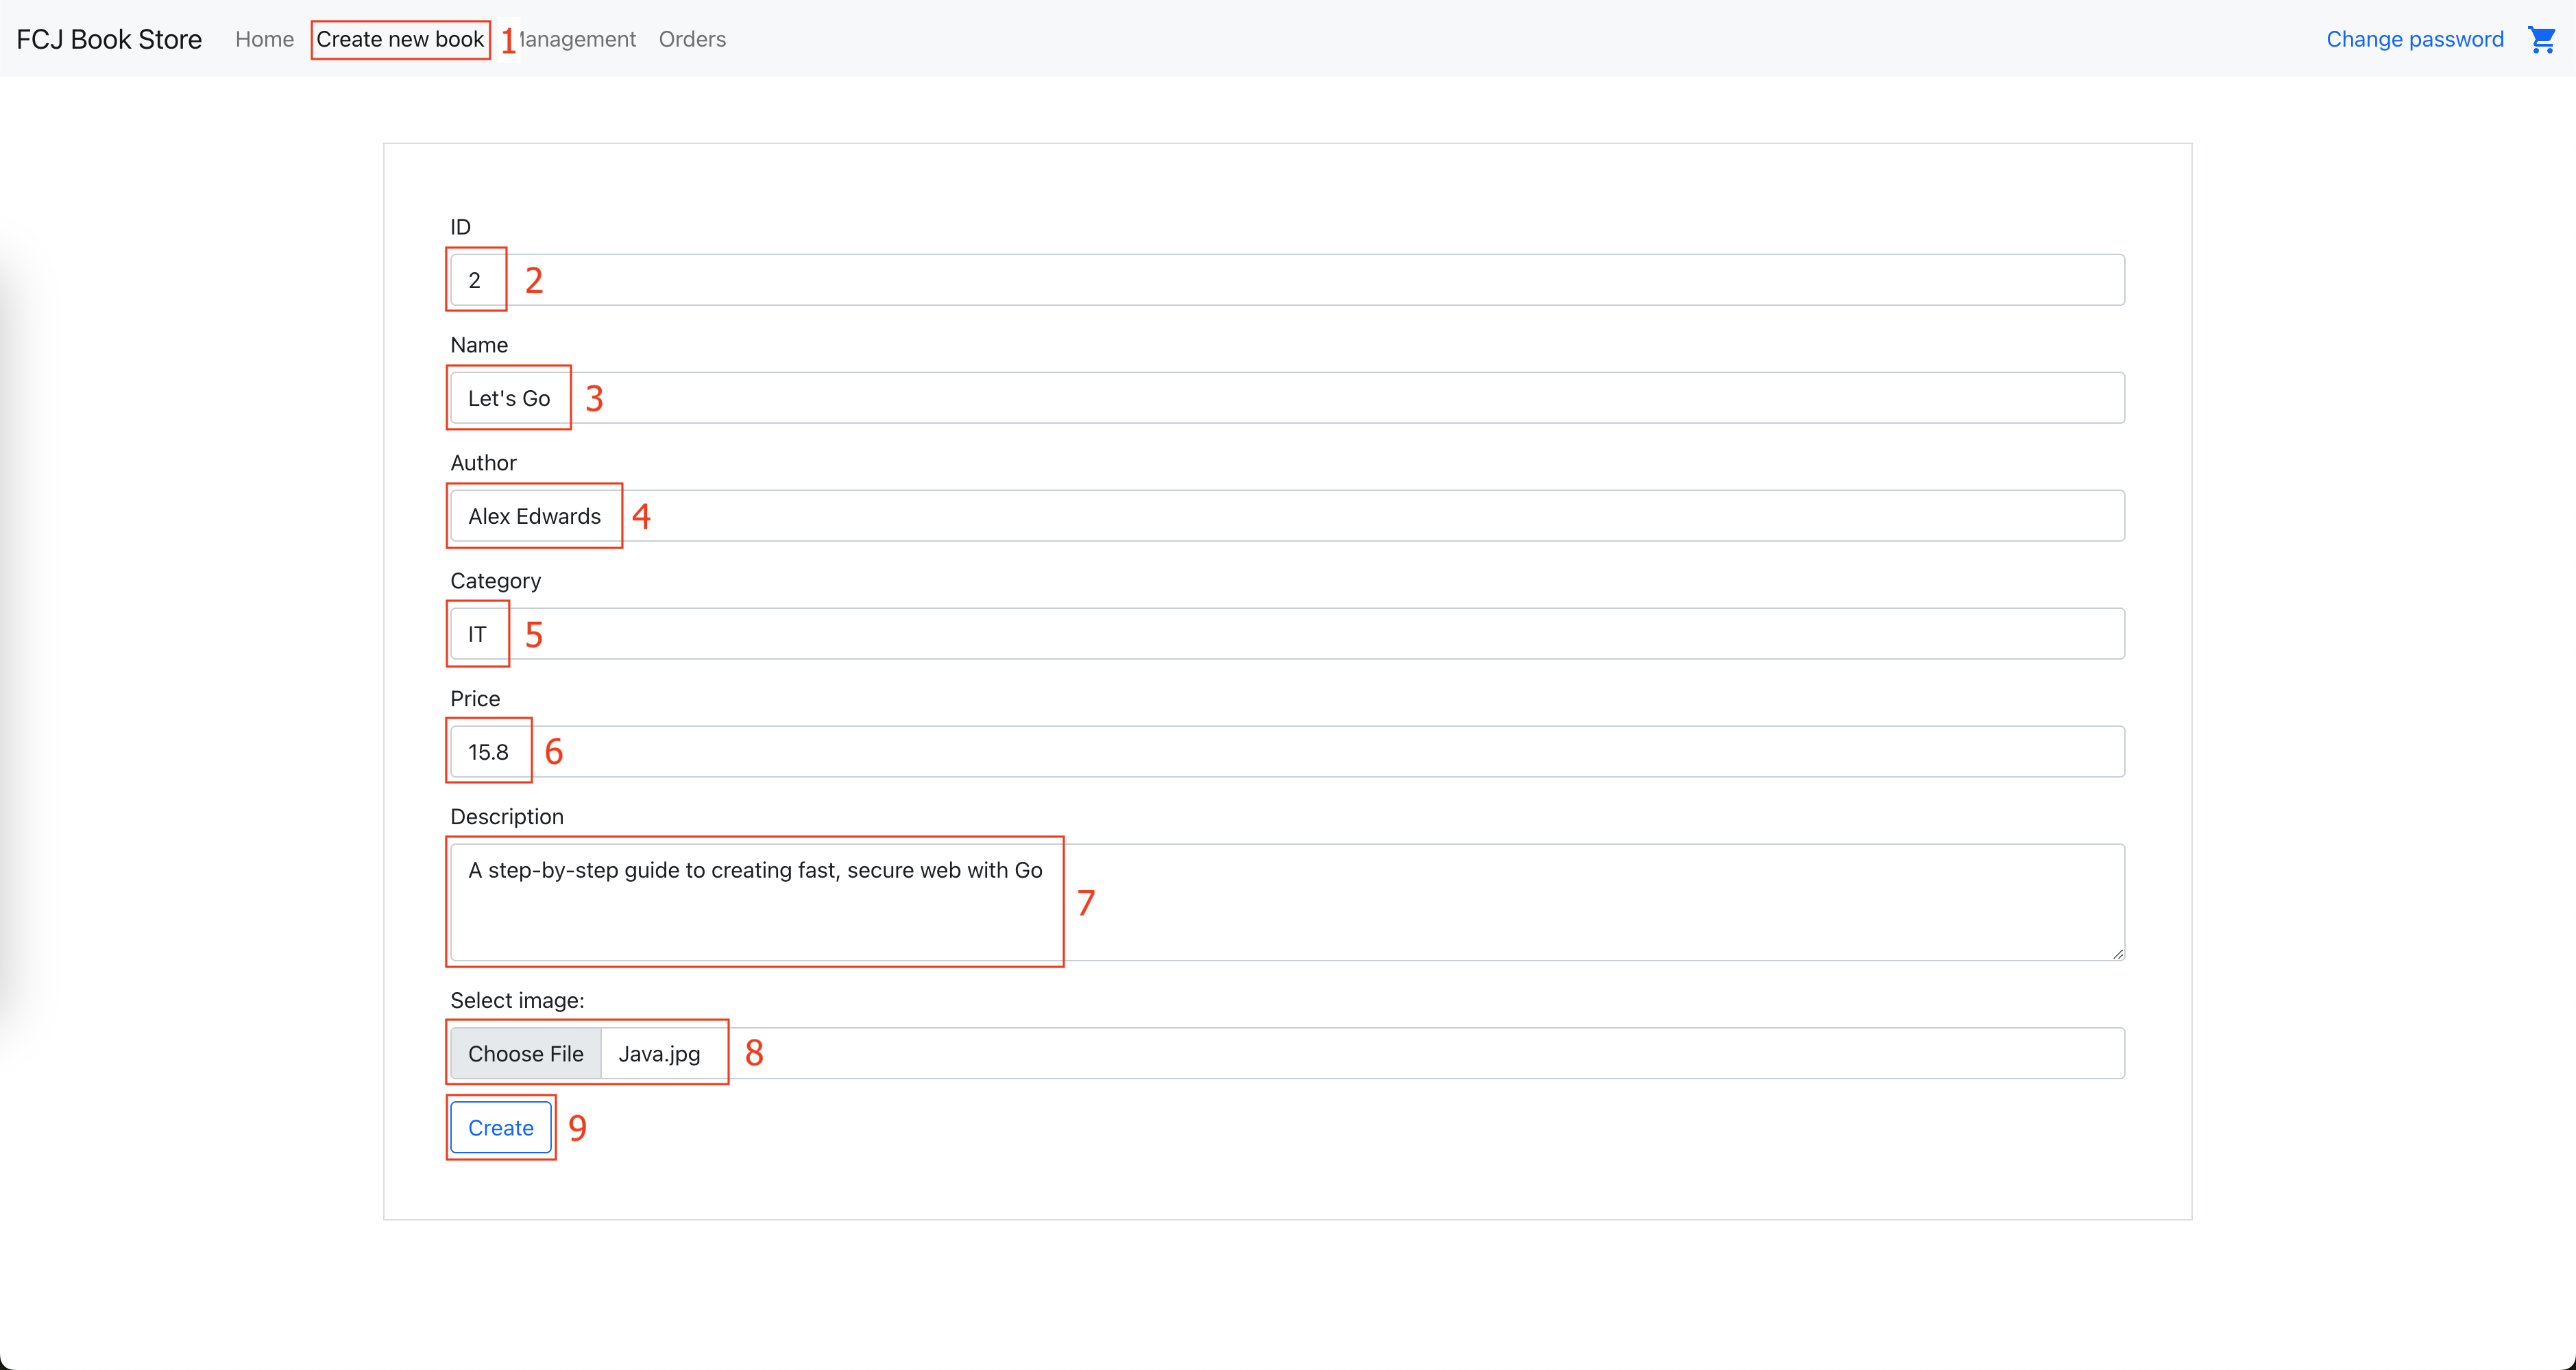
  1. Click Create new book

AddData

  1. Enter the book information
  • Enter ID: 1
  • Enter book name: Java
  • Enter author: Jame Patternson
  • Enter catagory IT
  • Enter price: 10.98
  • Enter desciption: A beginner's guide to learning the basic of Java
  • Click Choose File và chọn tệp ảnh Java.jpg mà bạn vừa tải về
  • Click Create

AddData

  1. Ấn OK

AddData

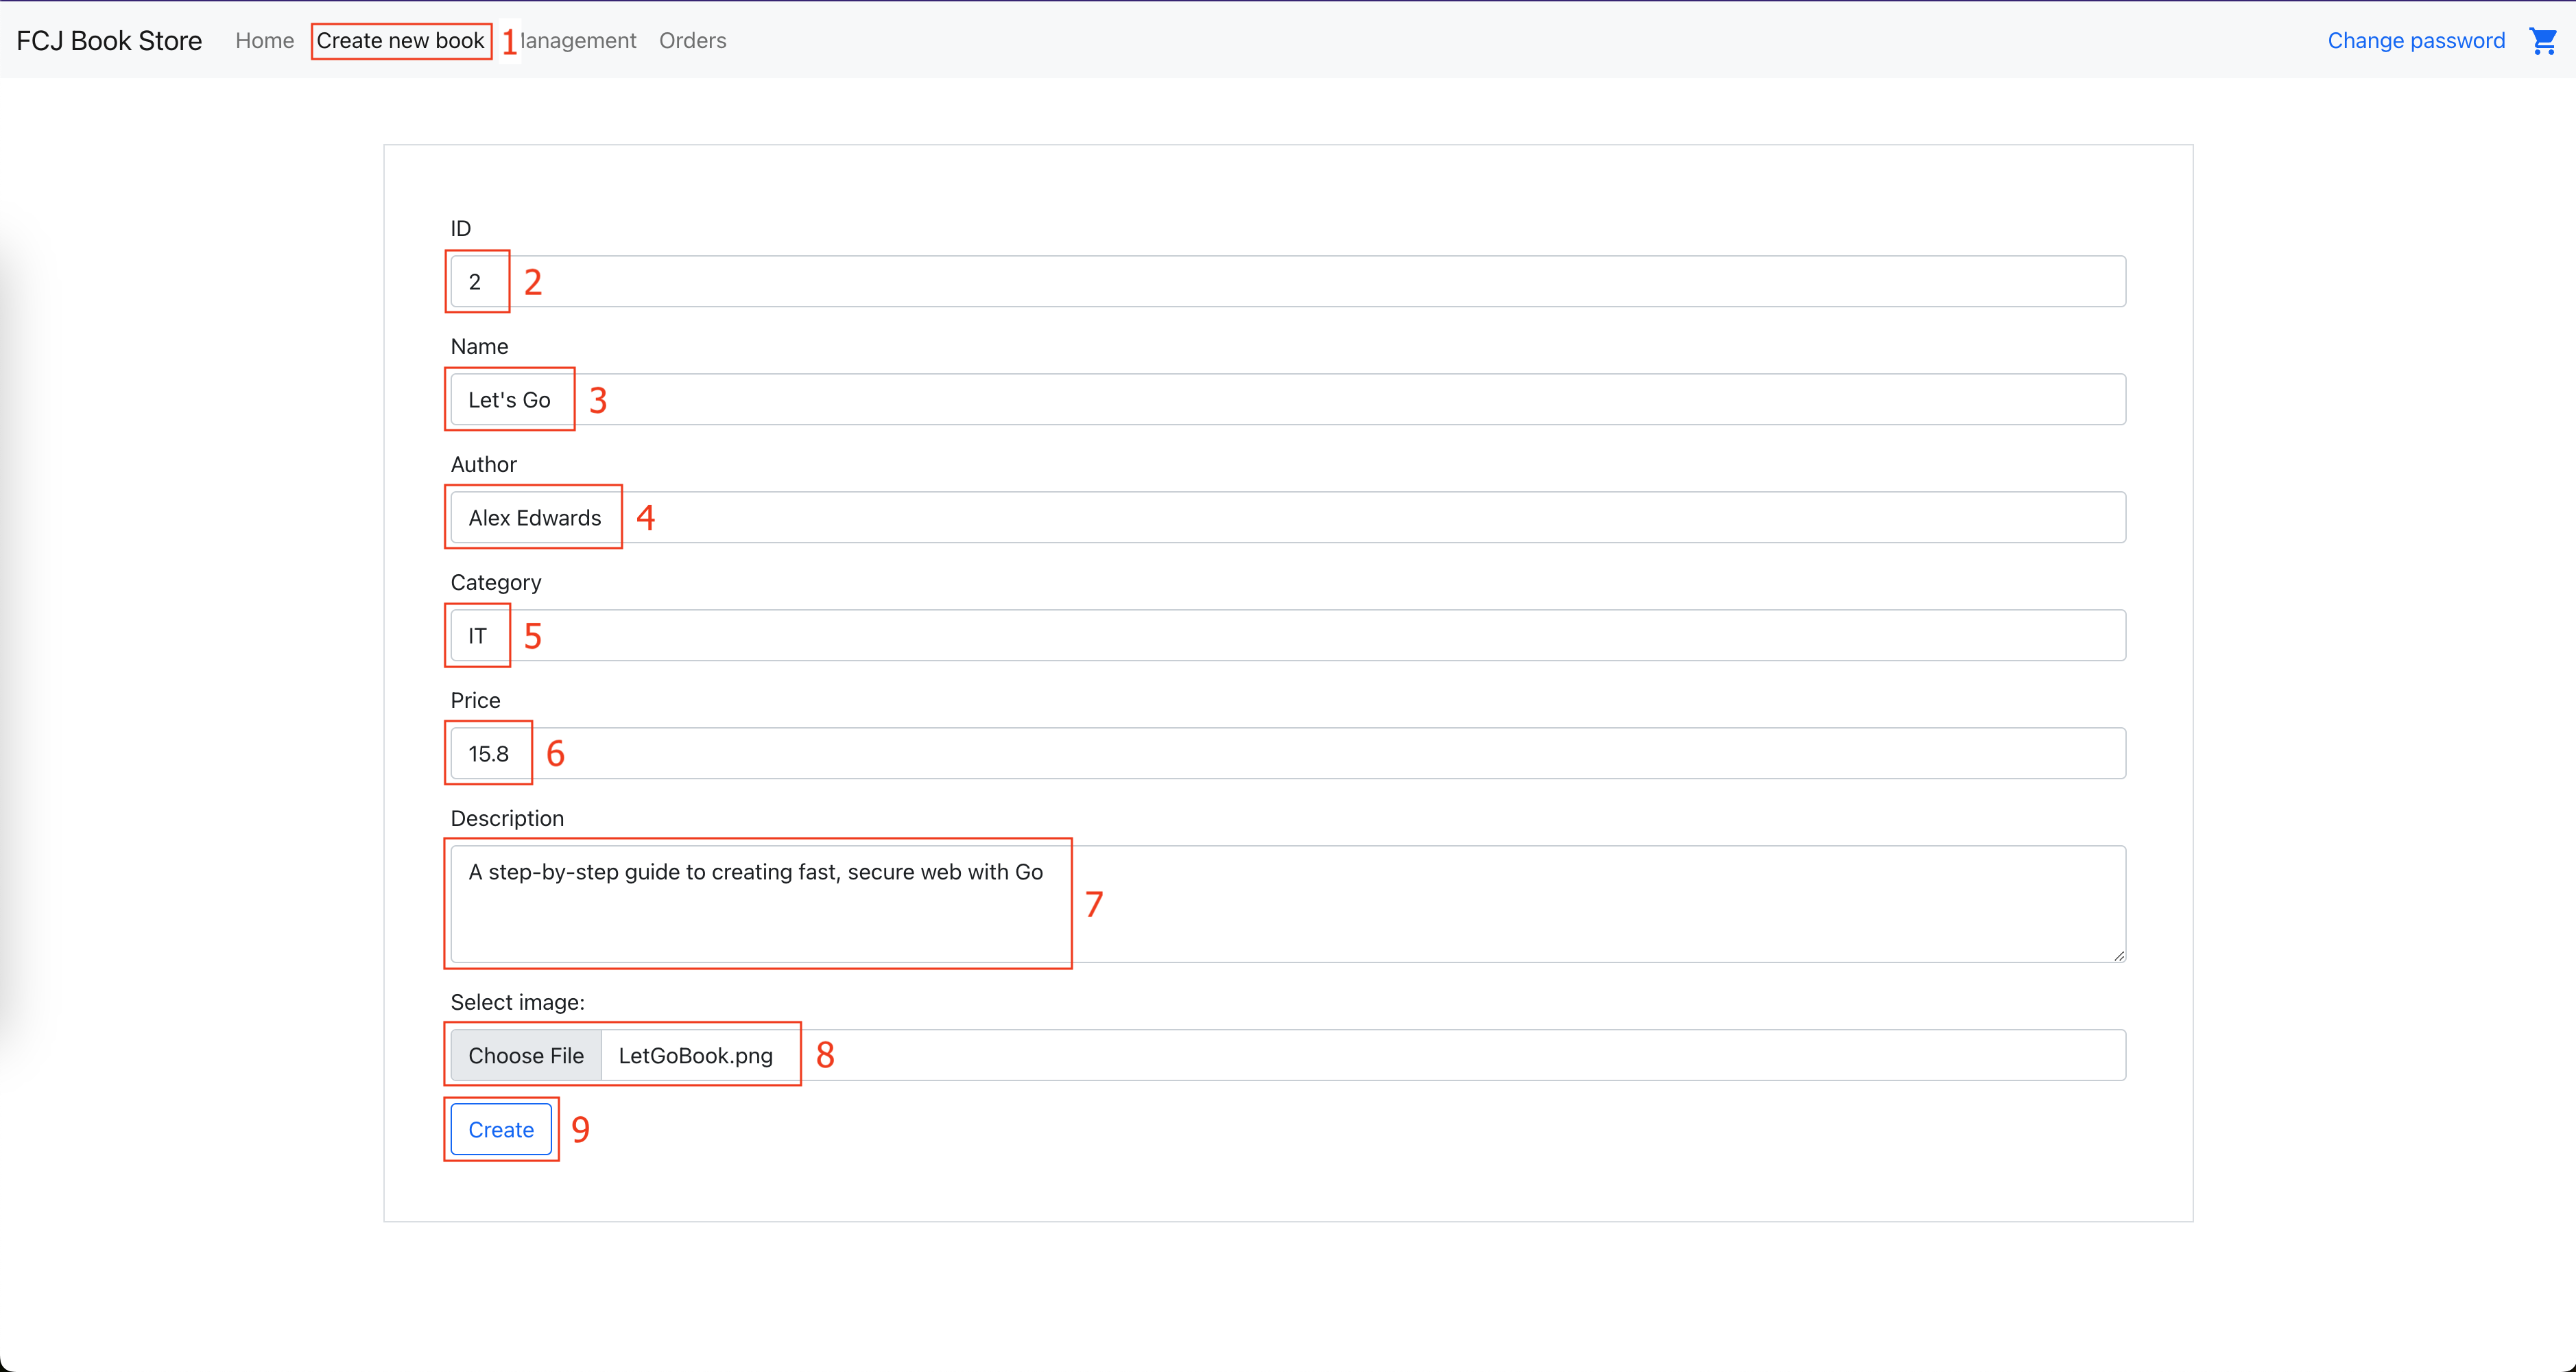
  1. Ấn Create new book
  • Enter ID: 2
  • Enter book name: Let's Go
  • Enter author: Alex Edwards
  • Enter catagory: IT
  • Enter price: 15.8
  • Enter desciption: A step-by-step guide to creating fast, secure web with Go
  • Click Choose File và chọn tệp ảnh LetGoBook.png mà bạn vừa tải về
  • Click Create

AddData

  1. Click OK

AddData

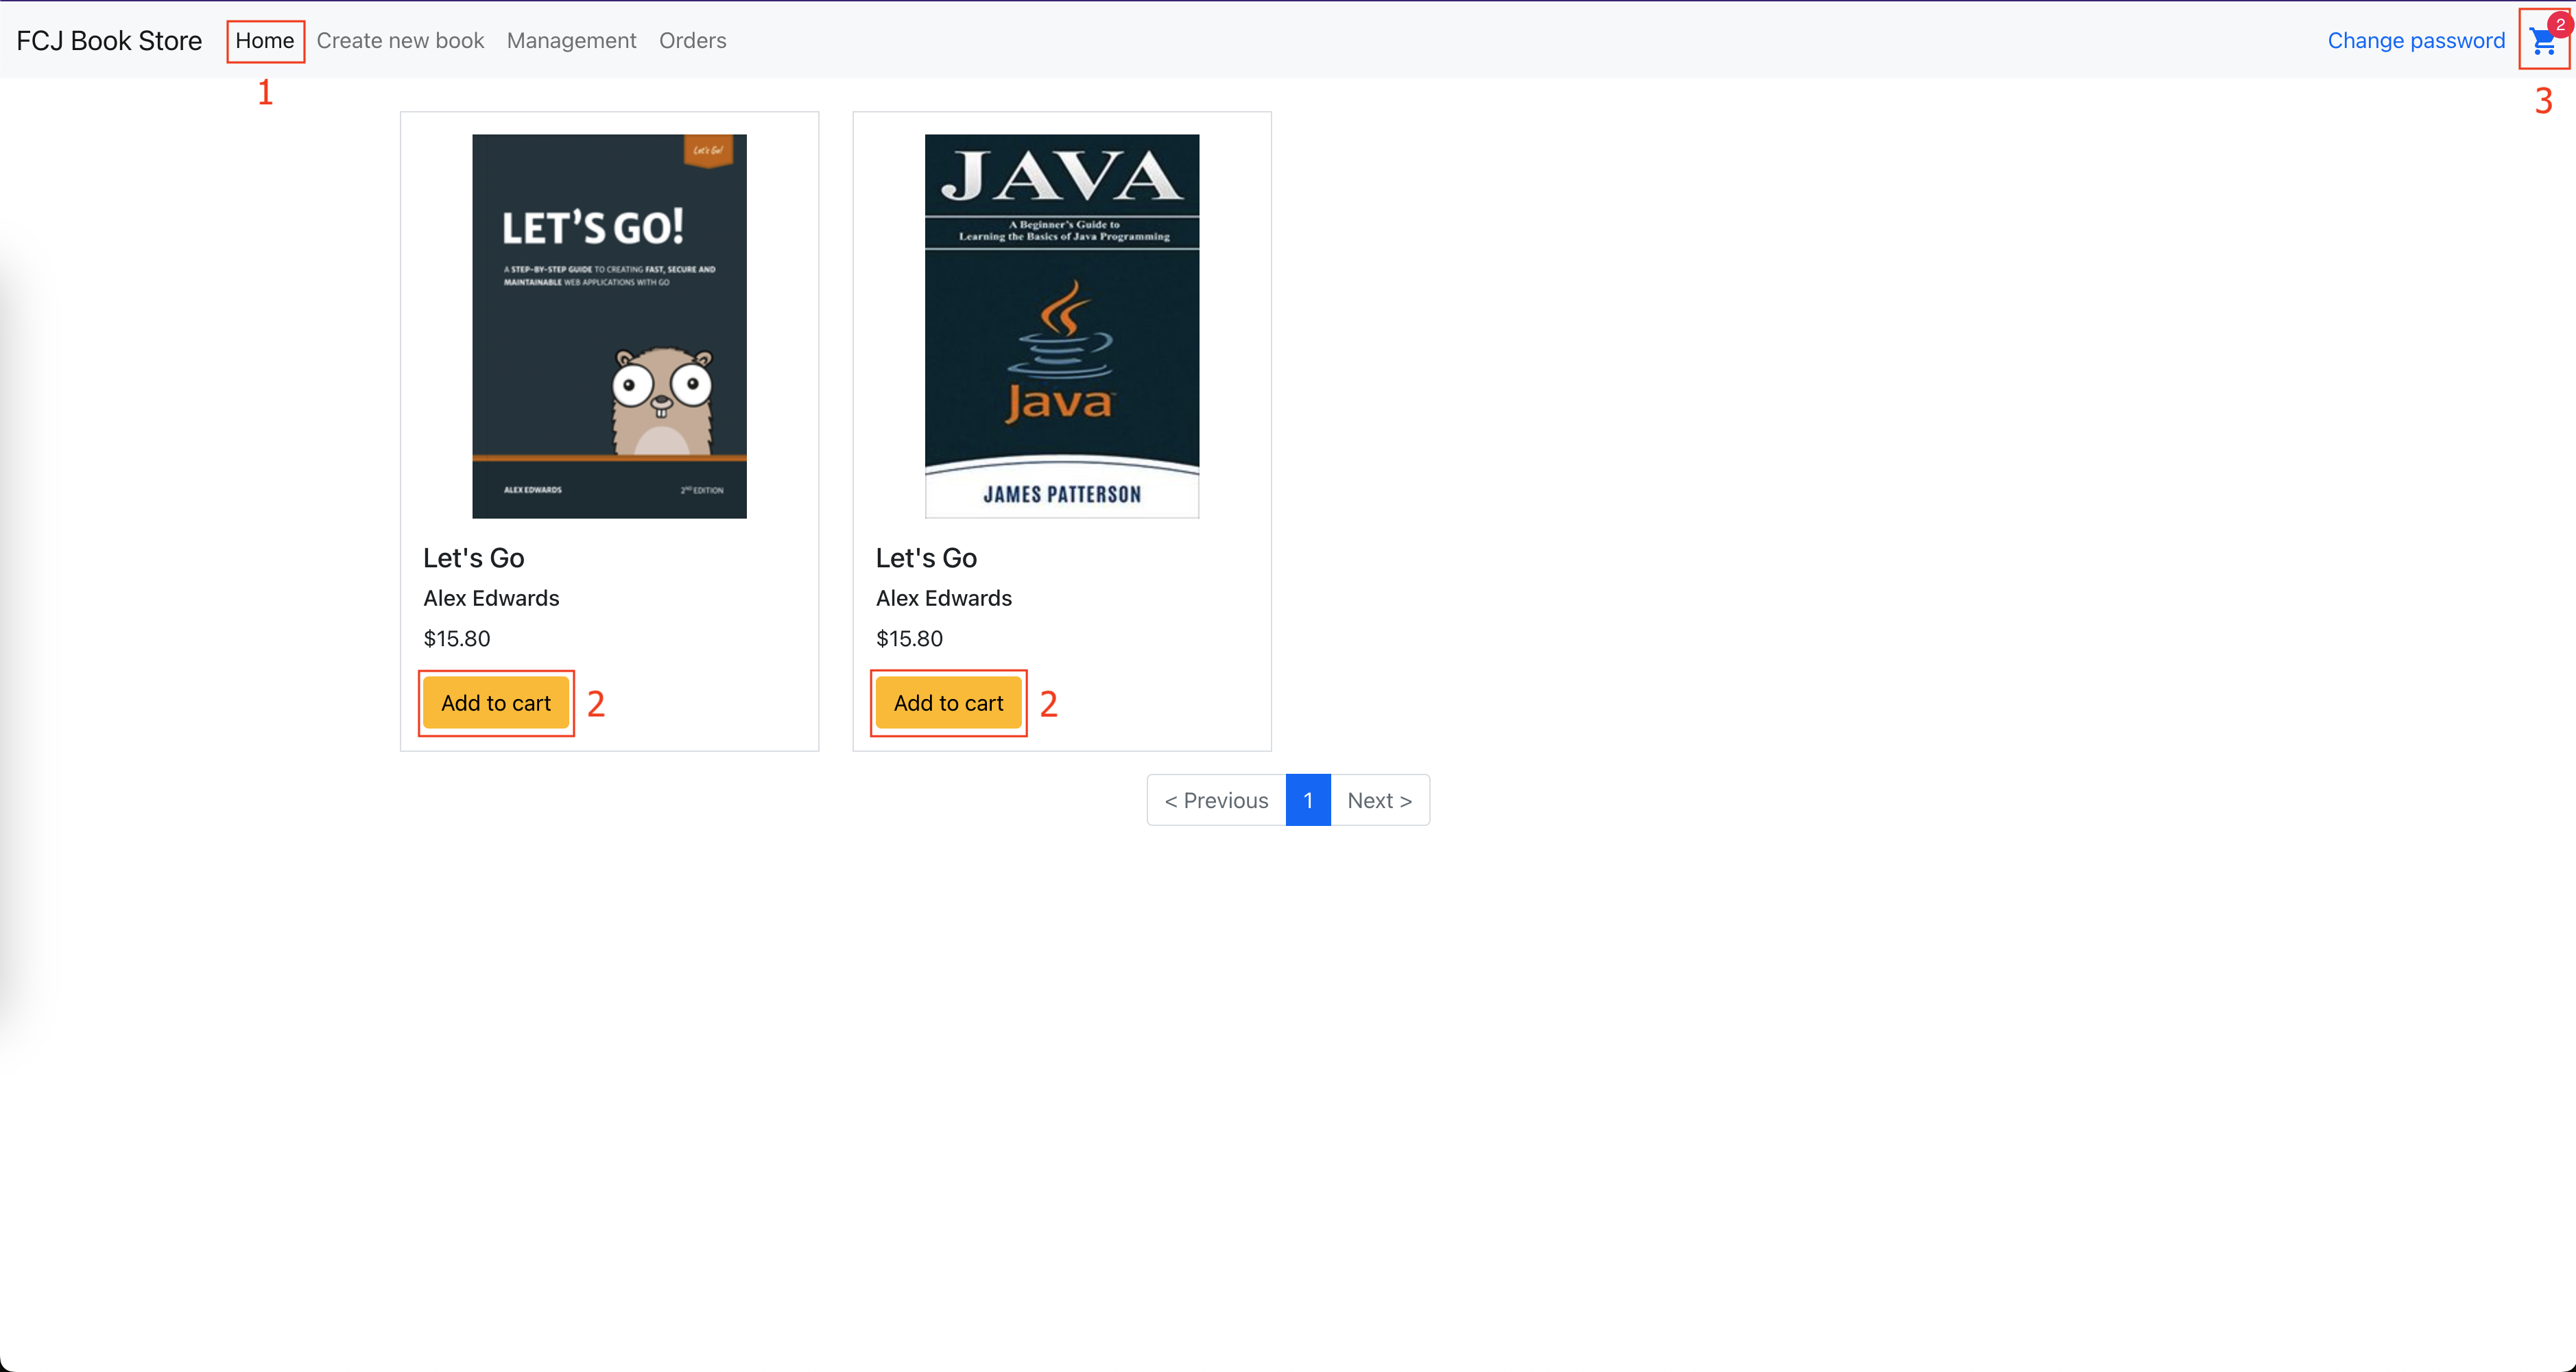
  1. Click Add to cart of each product

CheckOut

  1. Click on the cart icon in the upper right corner

CreateRecord

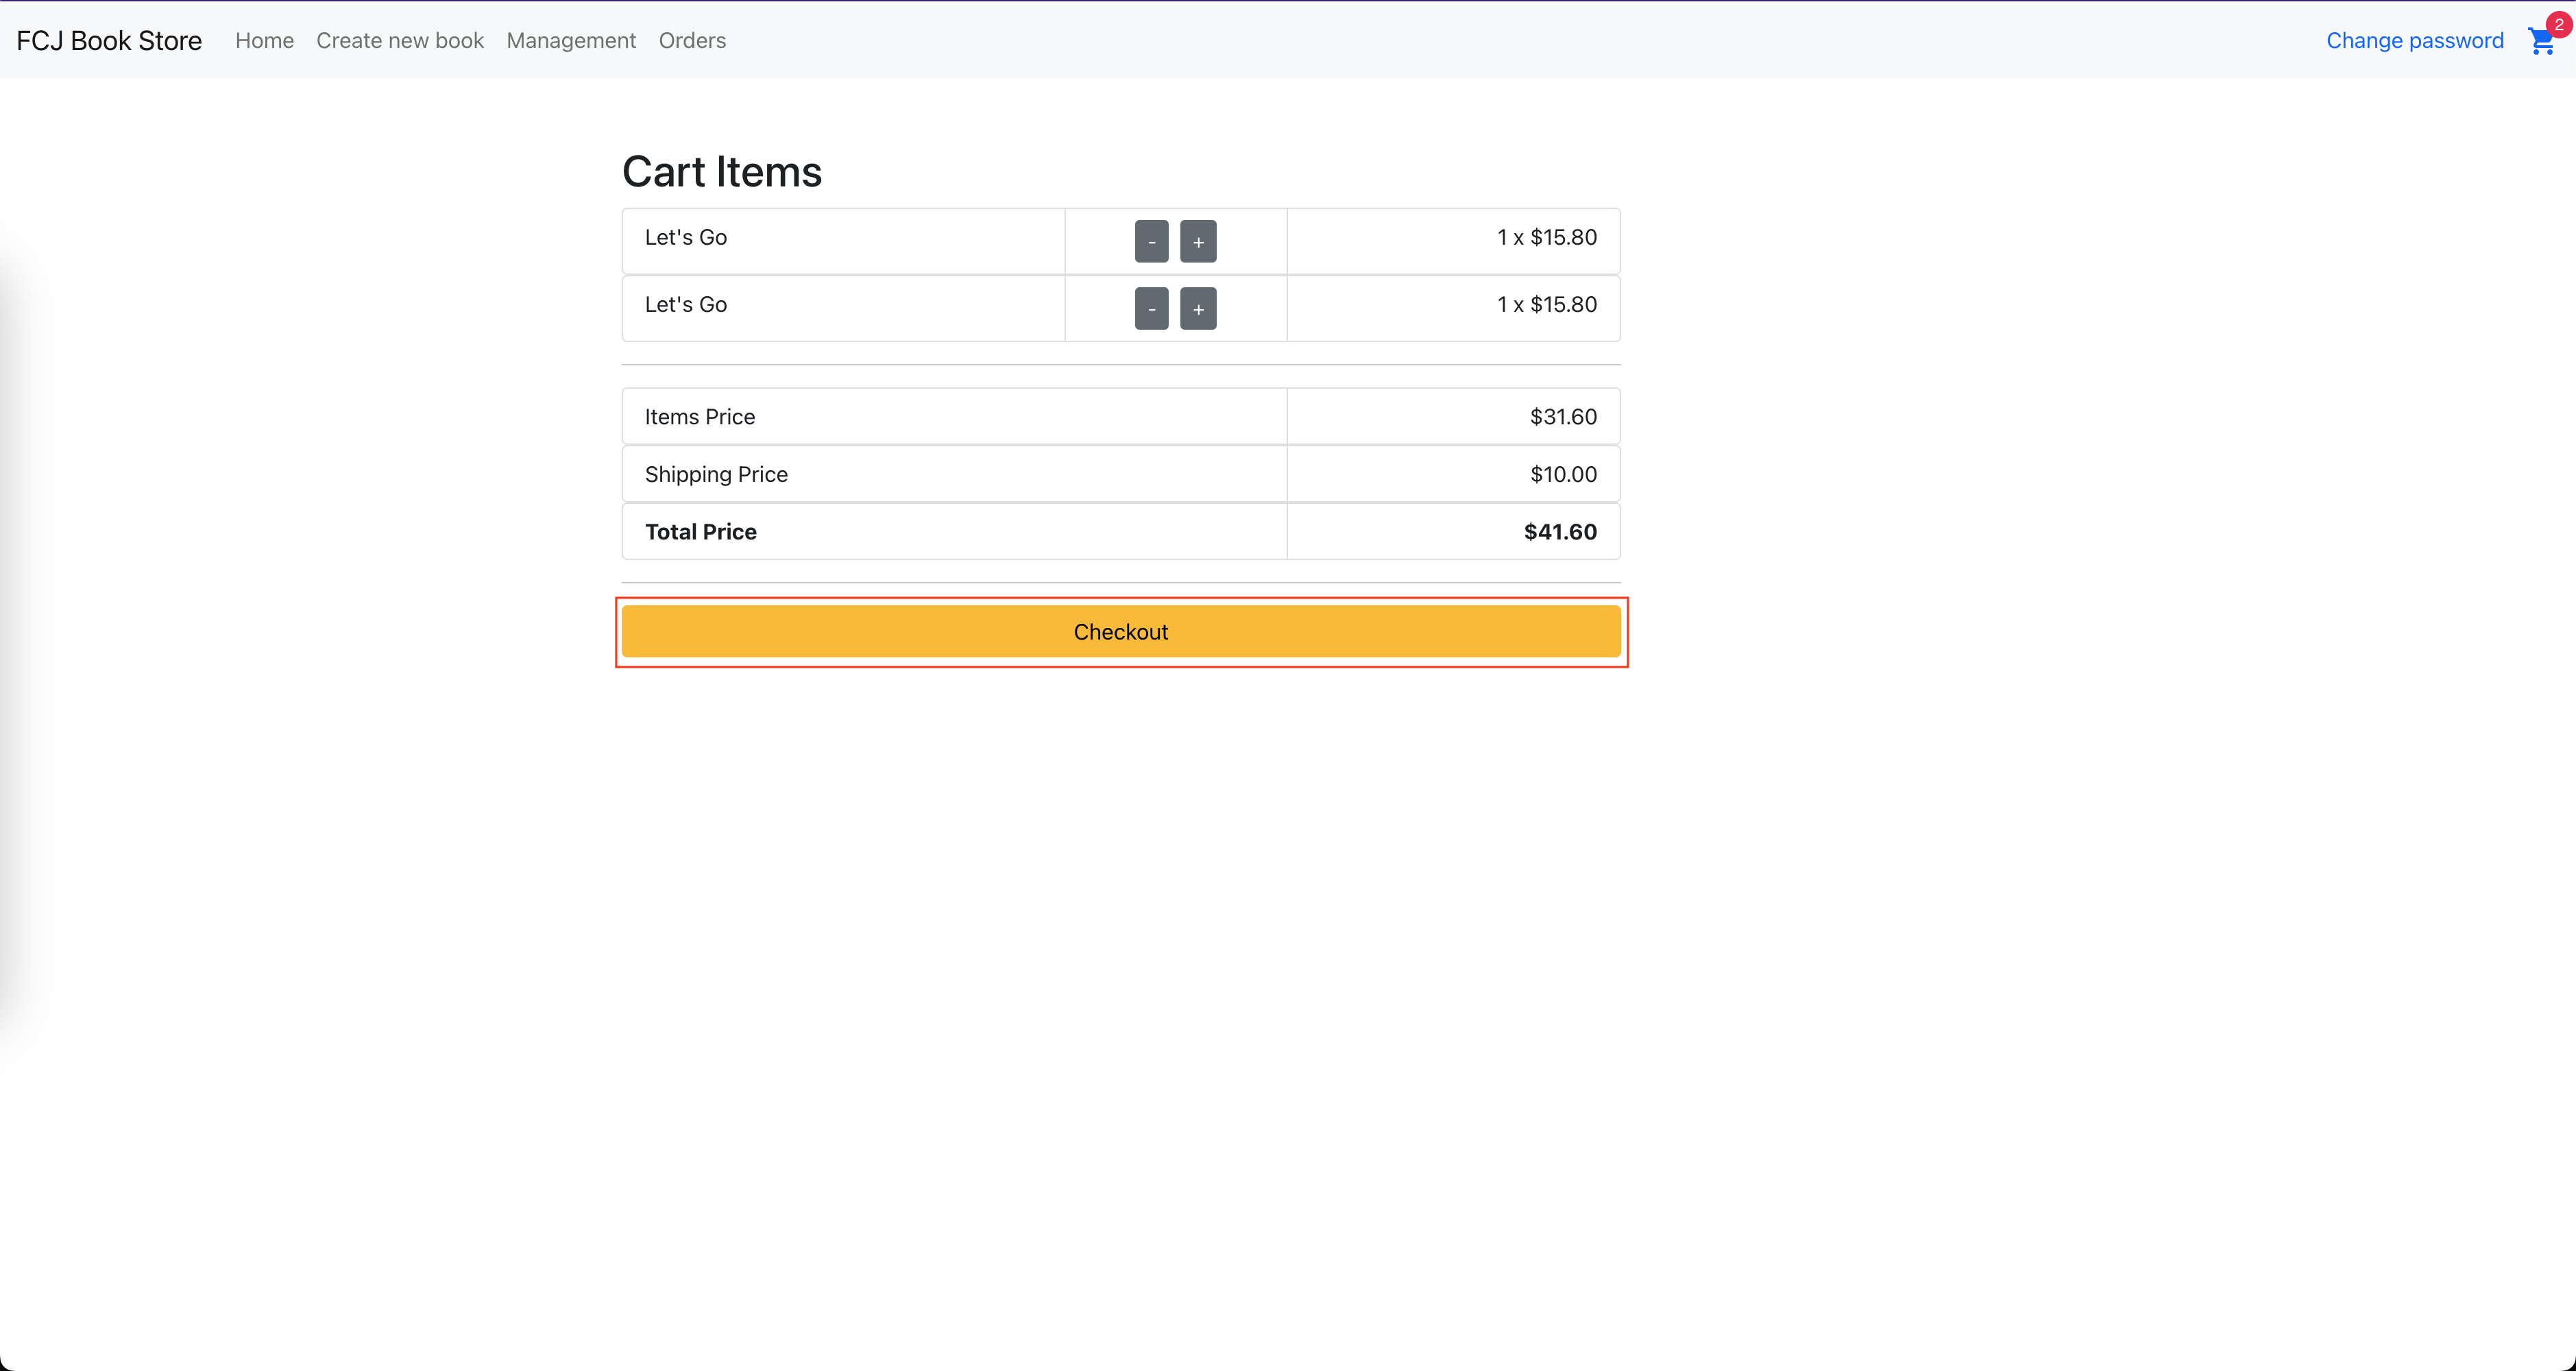
  1. Click Checkout

CreateRecord

  • Click OK

CreateRecord

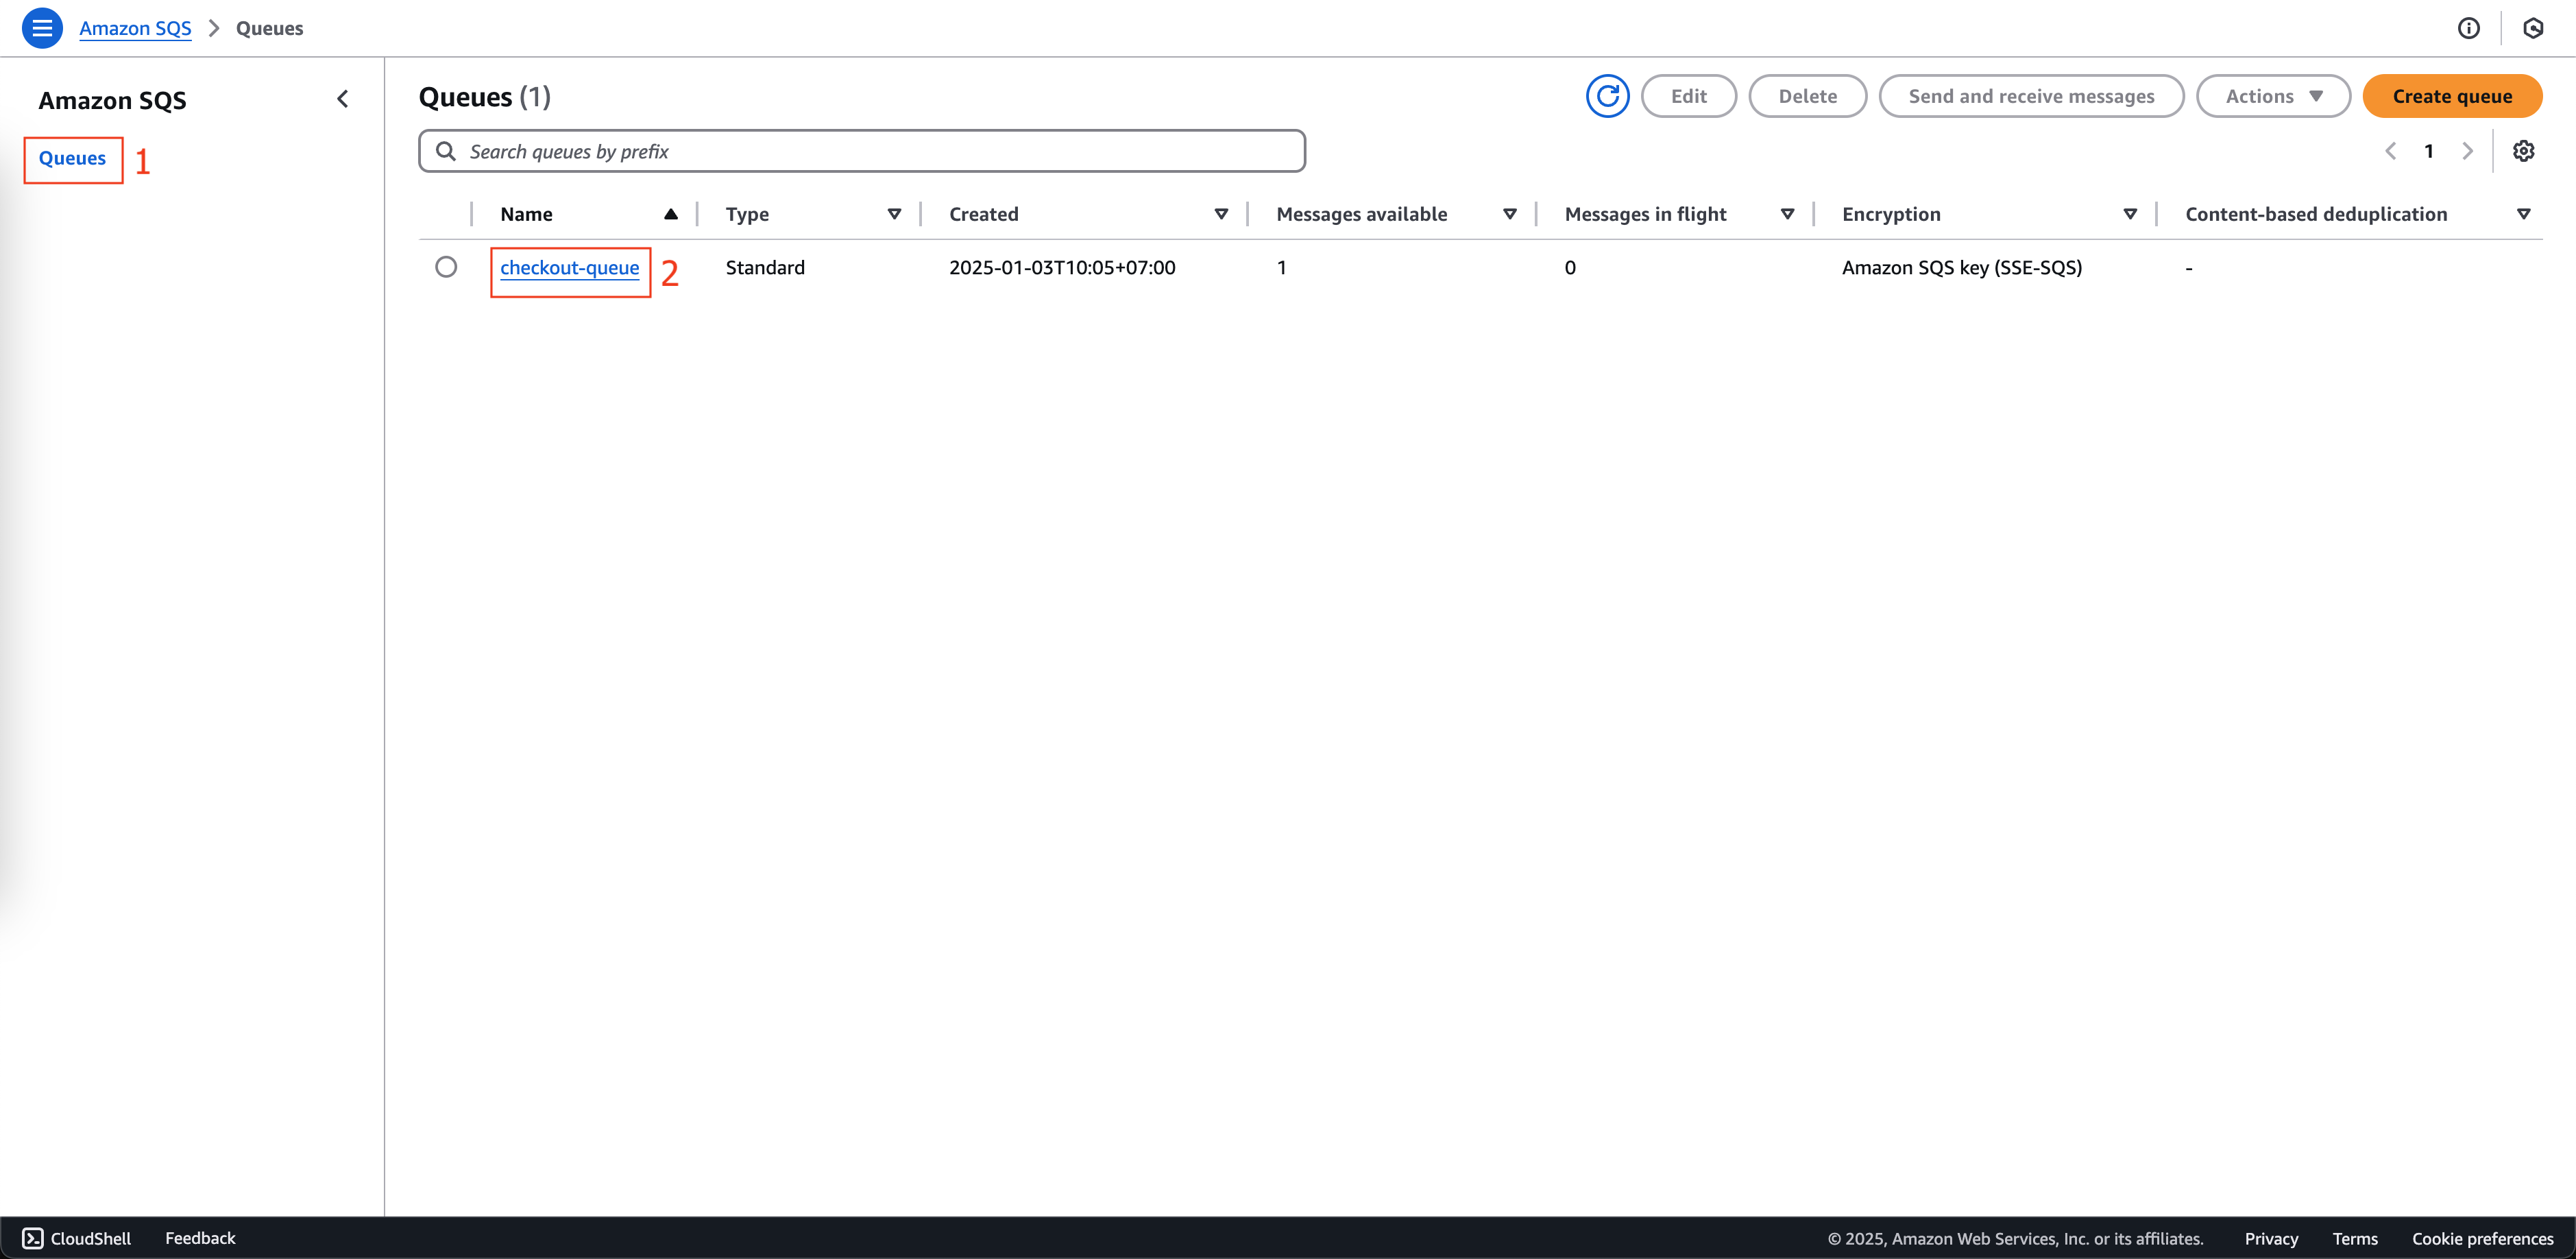
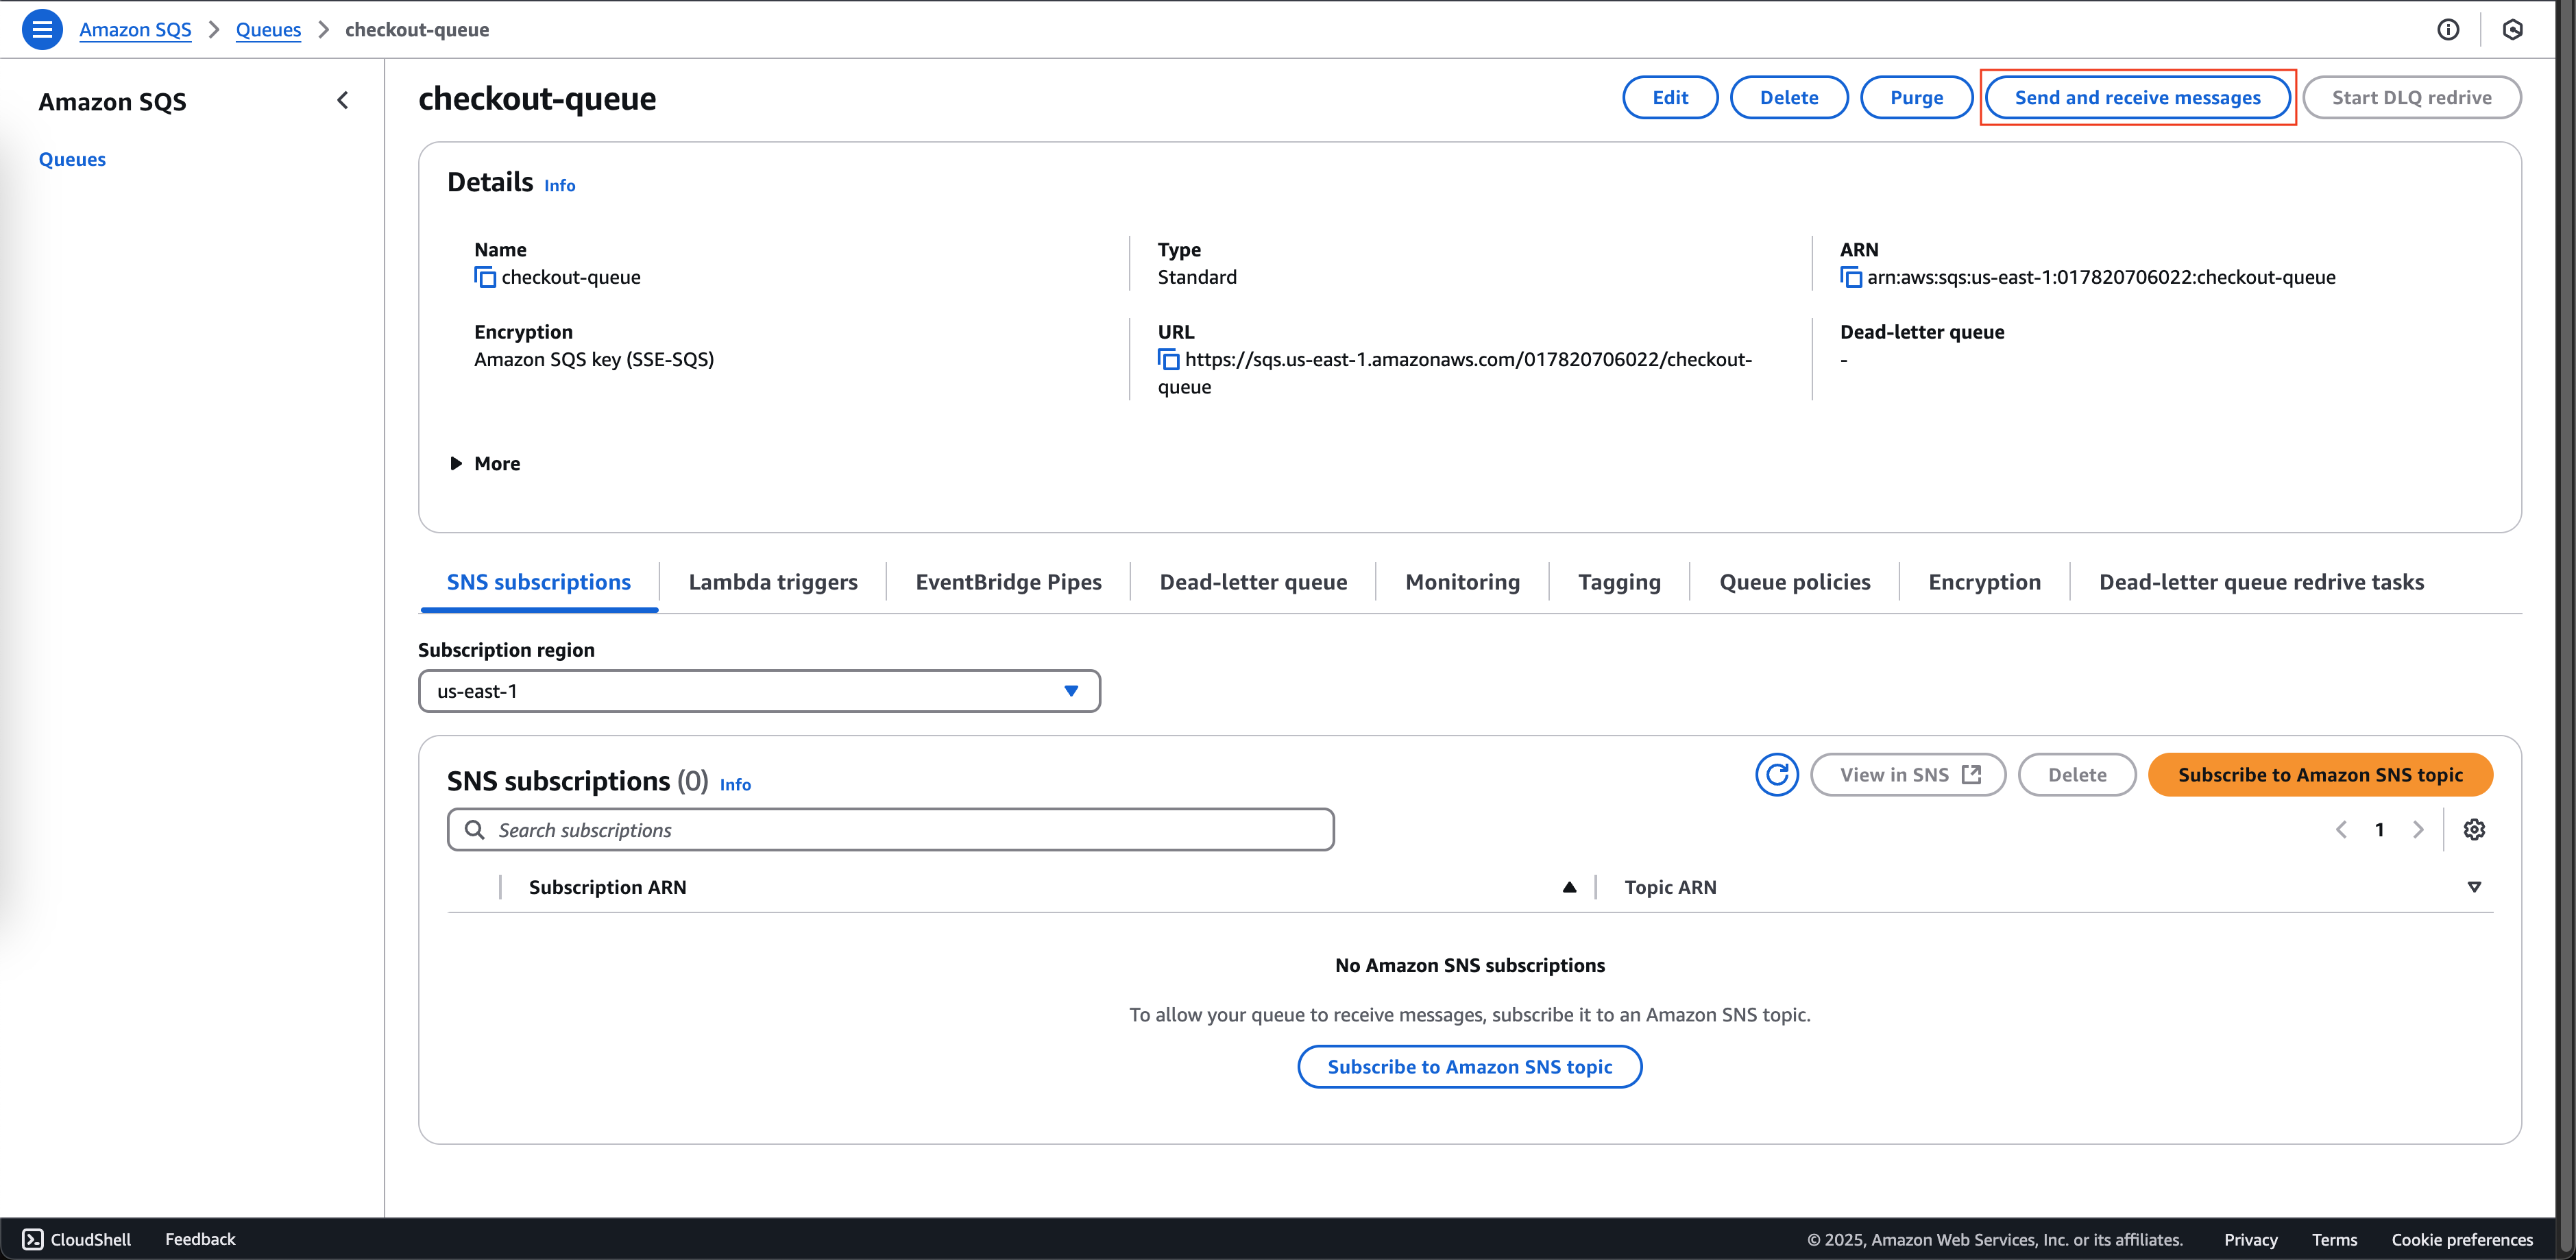
  1. Back to Amazon SQS console
  • Click Send and receive messages

CreateRecord

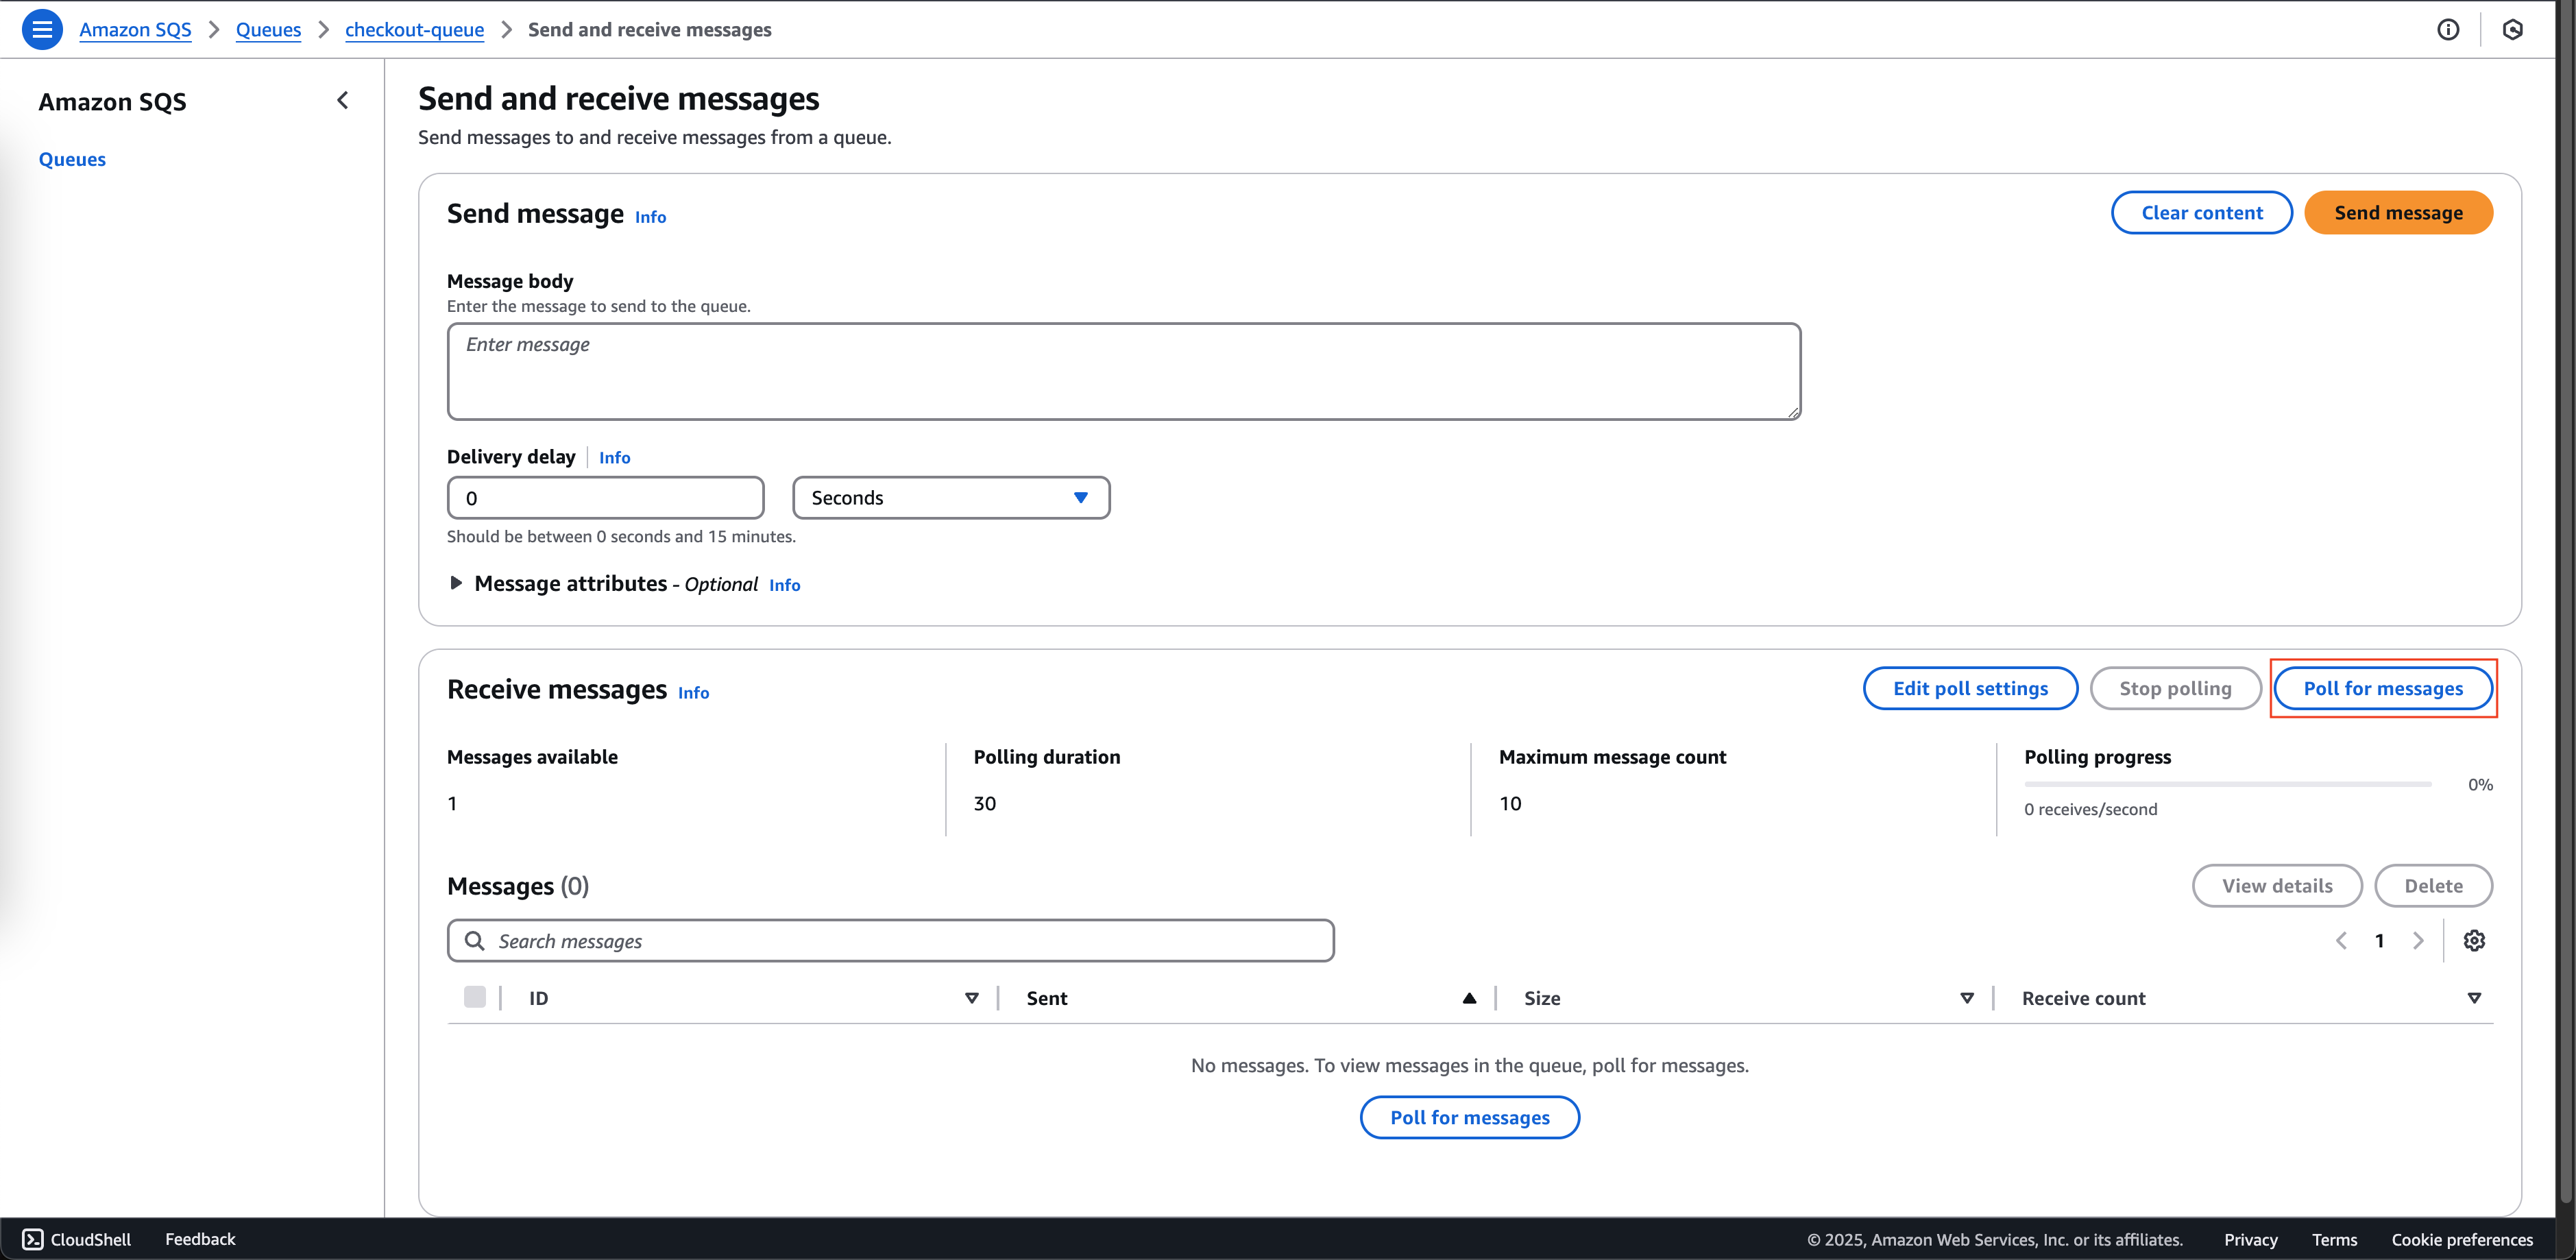
  1. Click Poll messages

CreateRecord

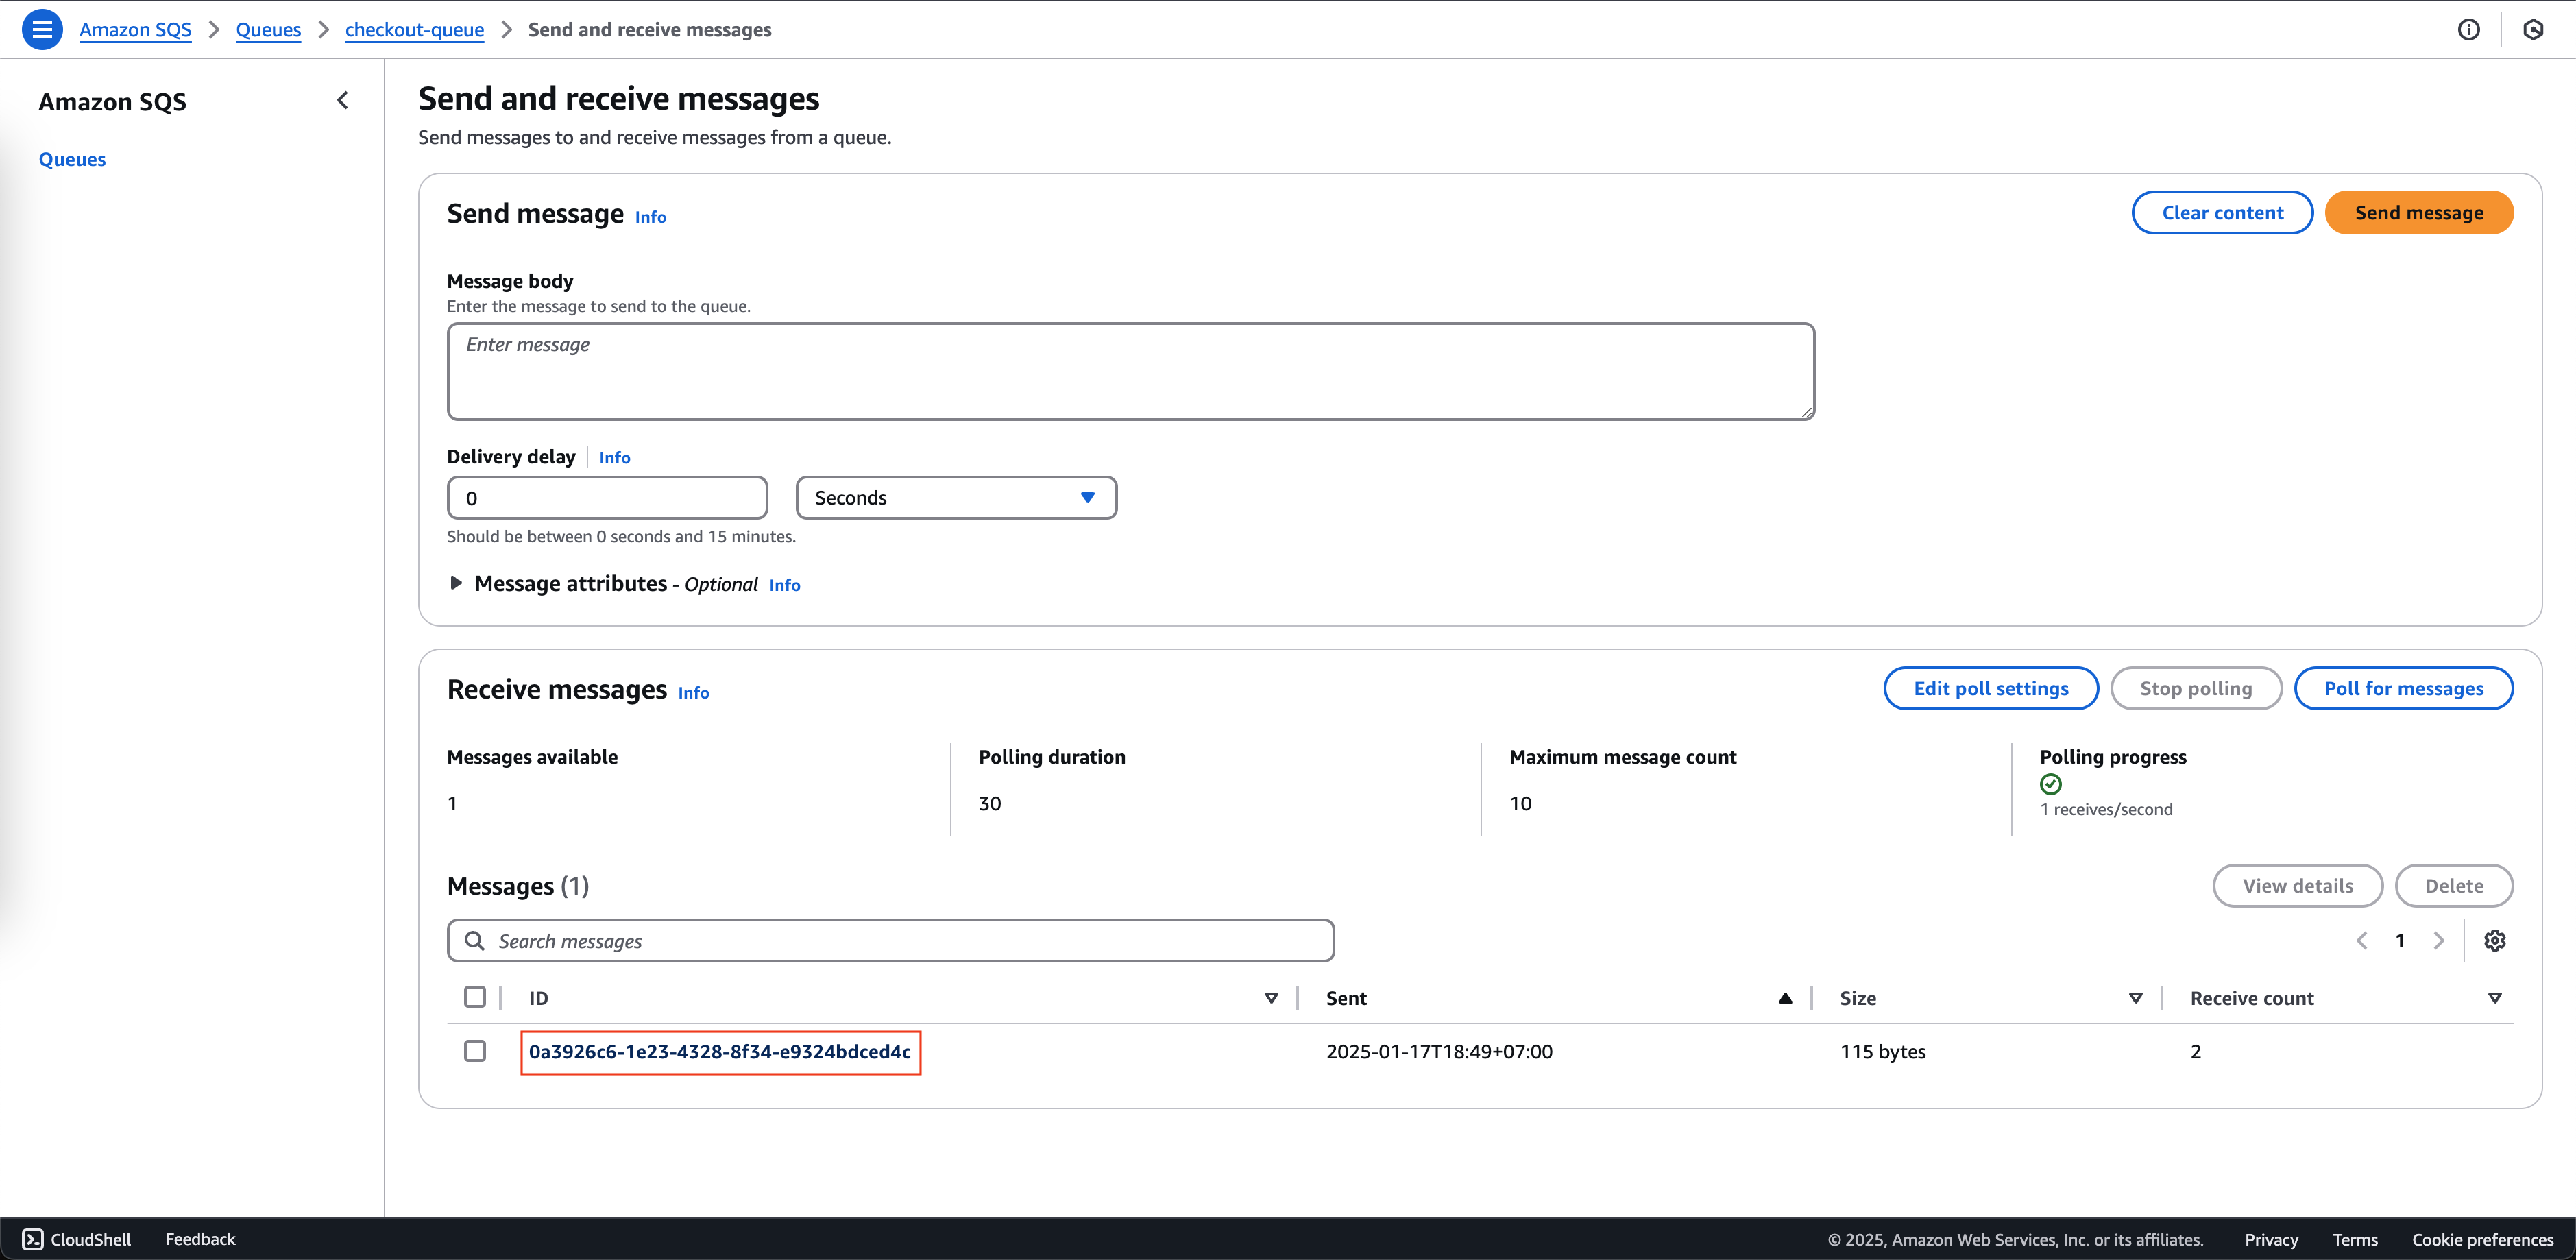
  1. Click to the showing message

CreateRecord

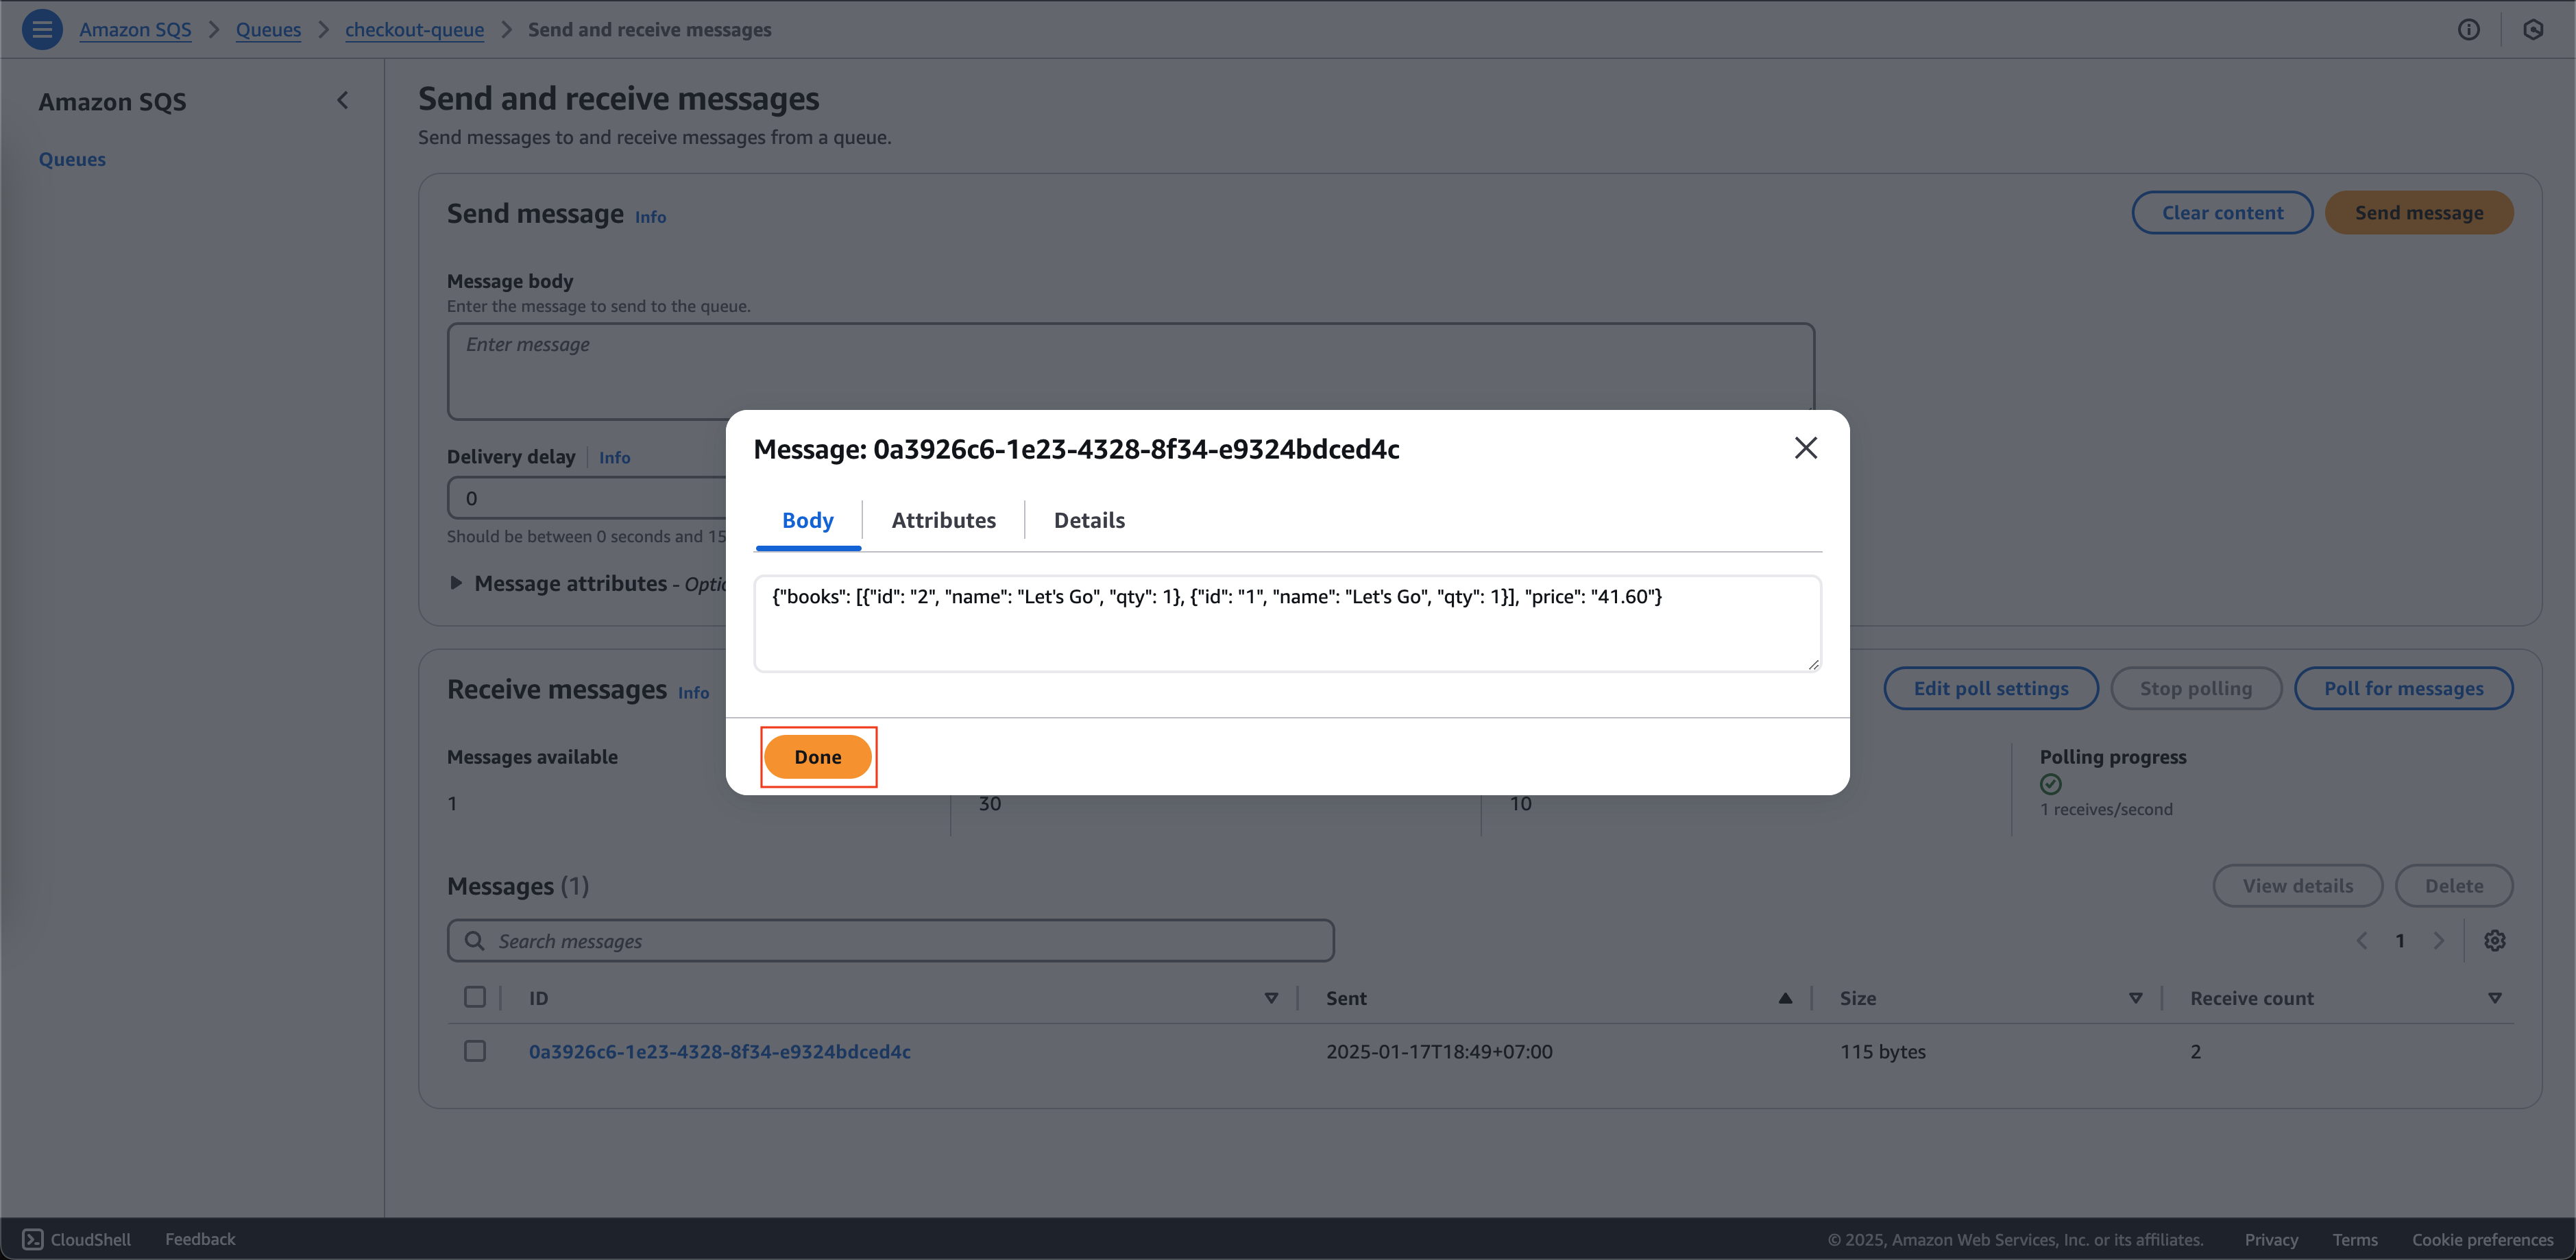
  1. View the content of the order, Click Done

CreateRecord

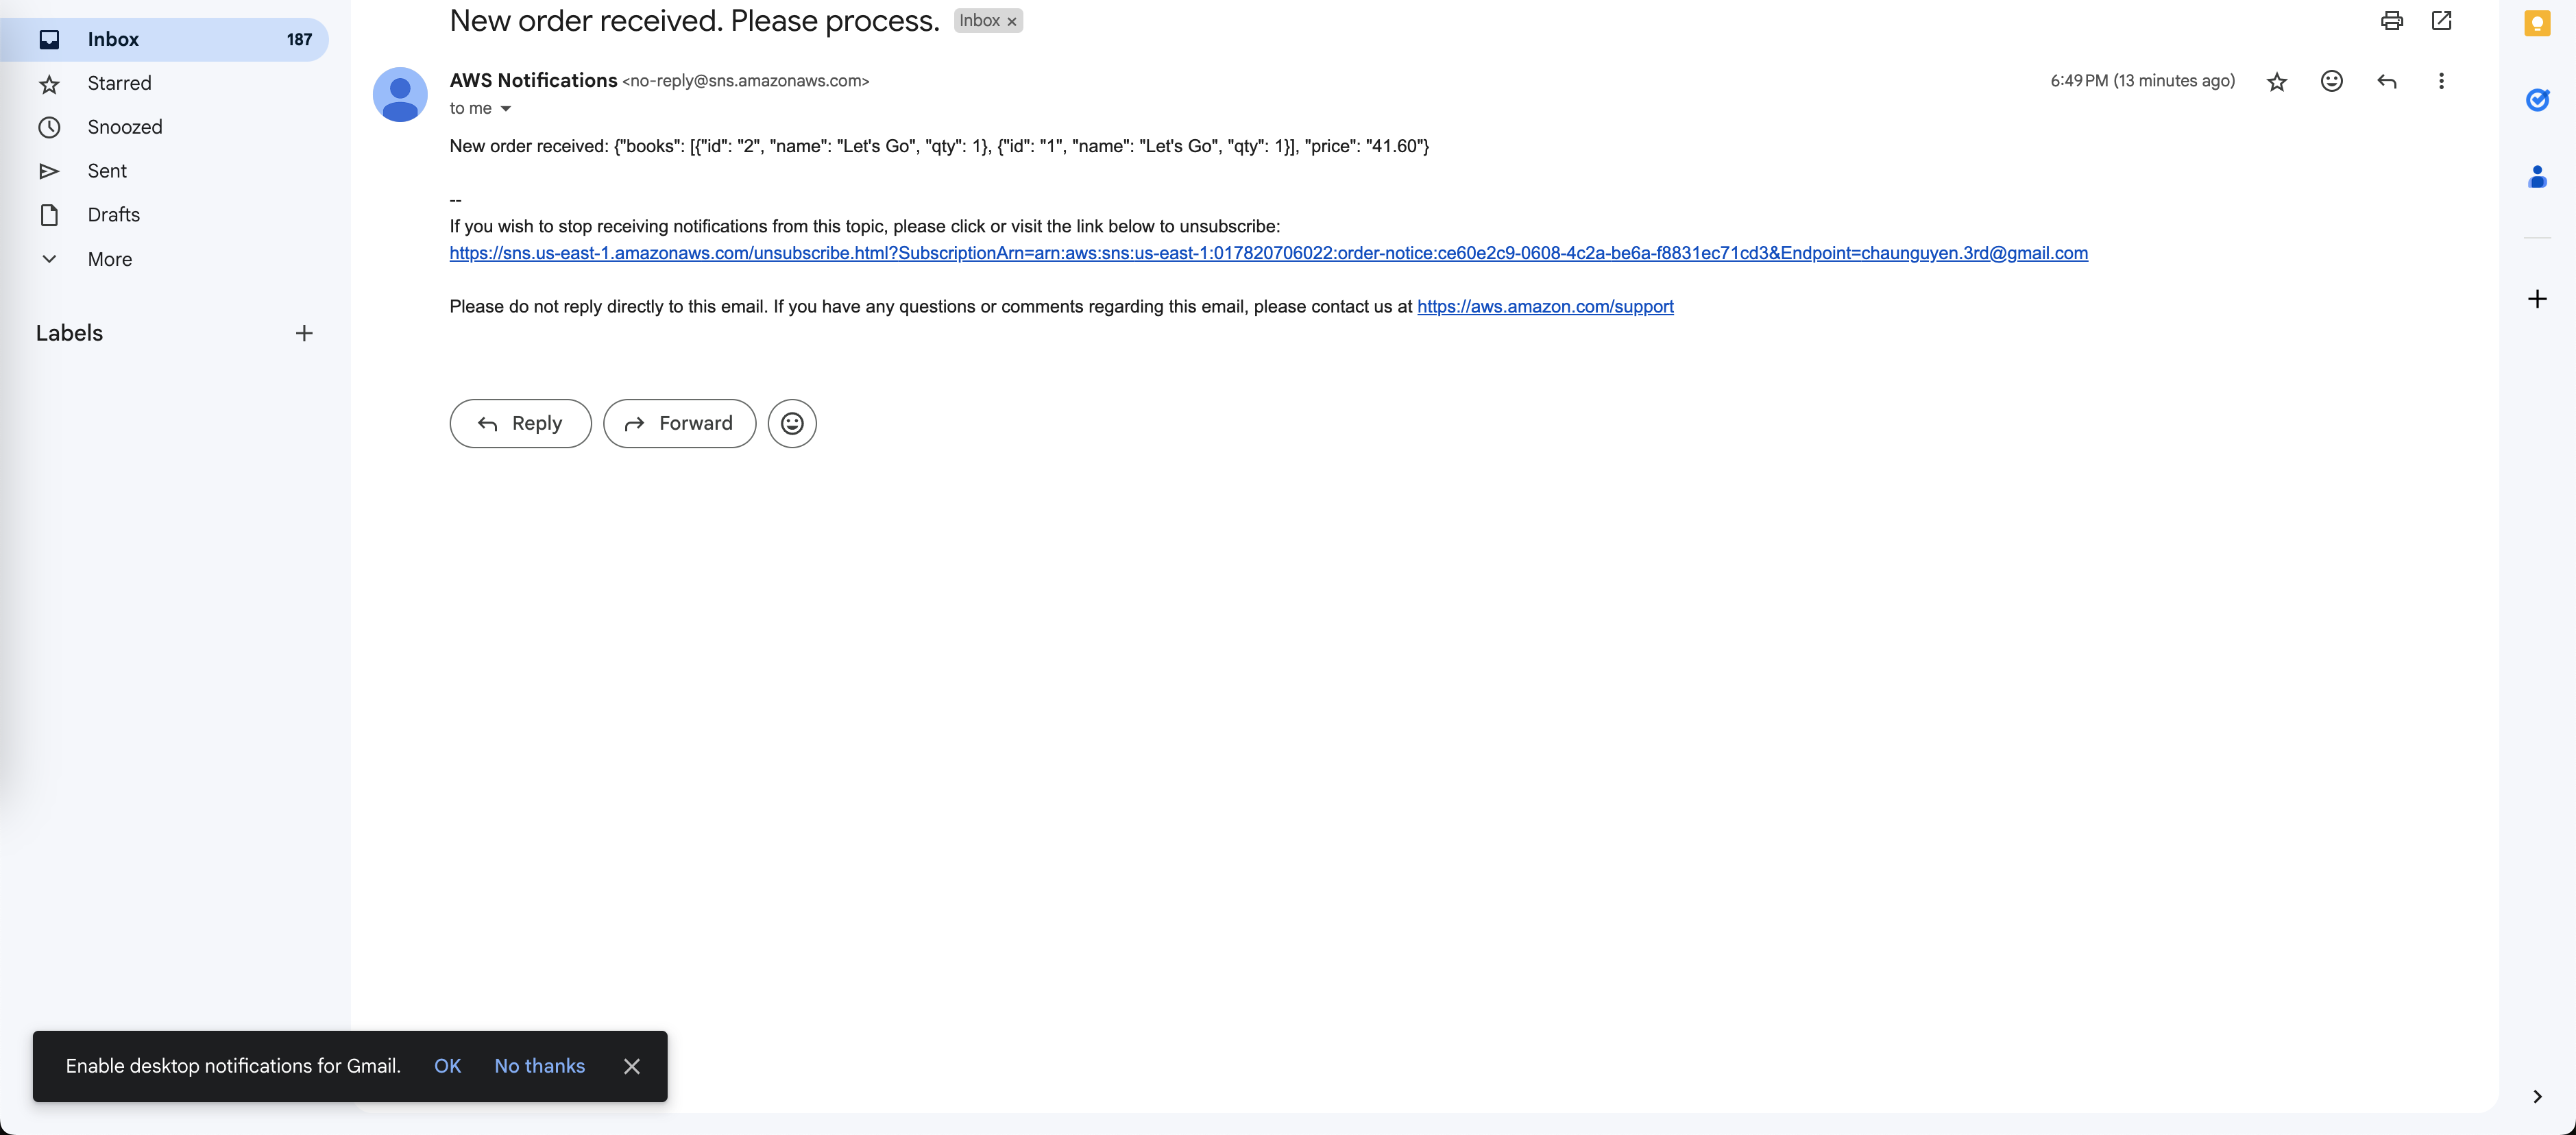
  1. Open email that you have subscribed to receive notification

CreateRecord

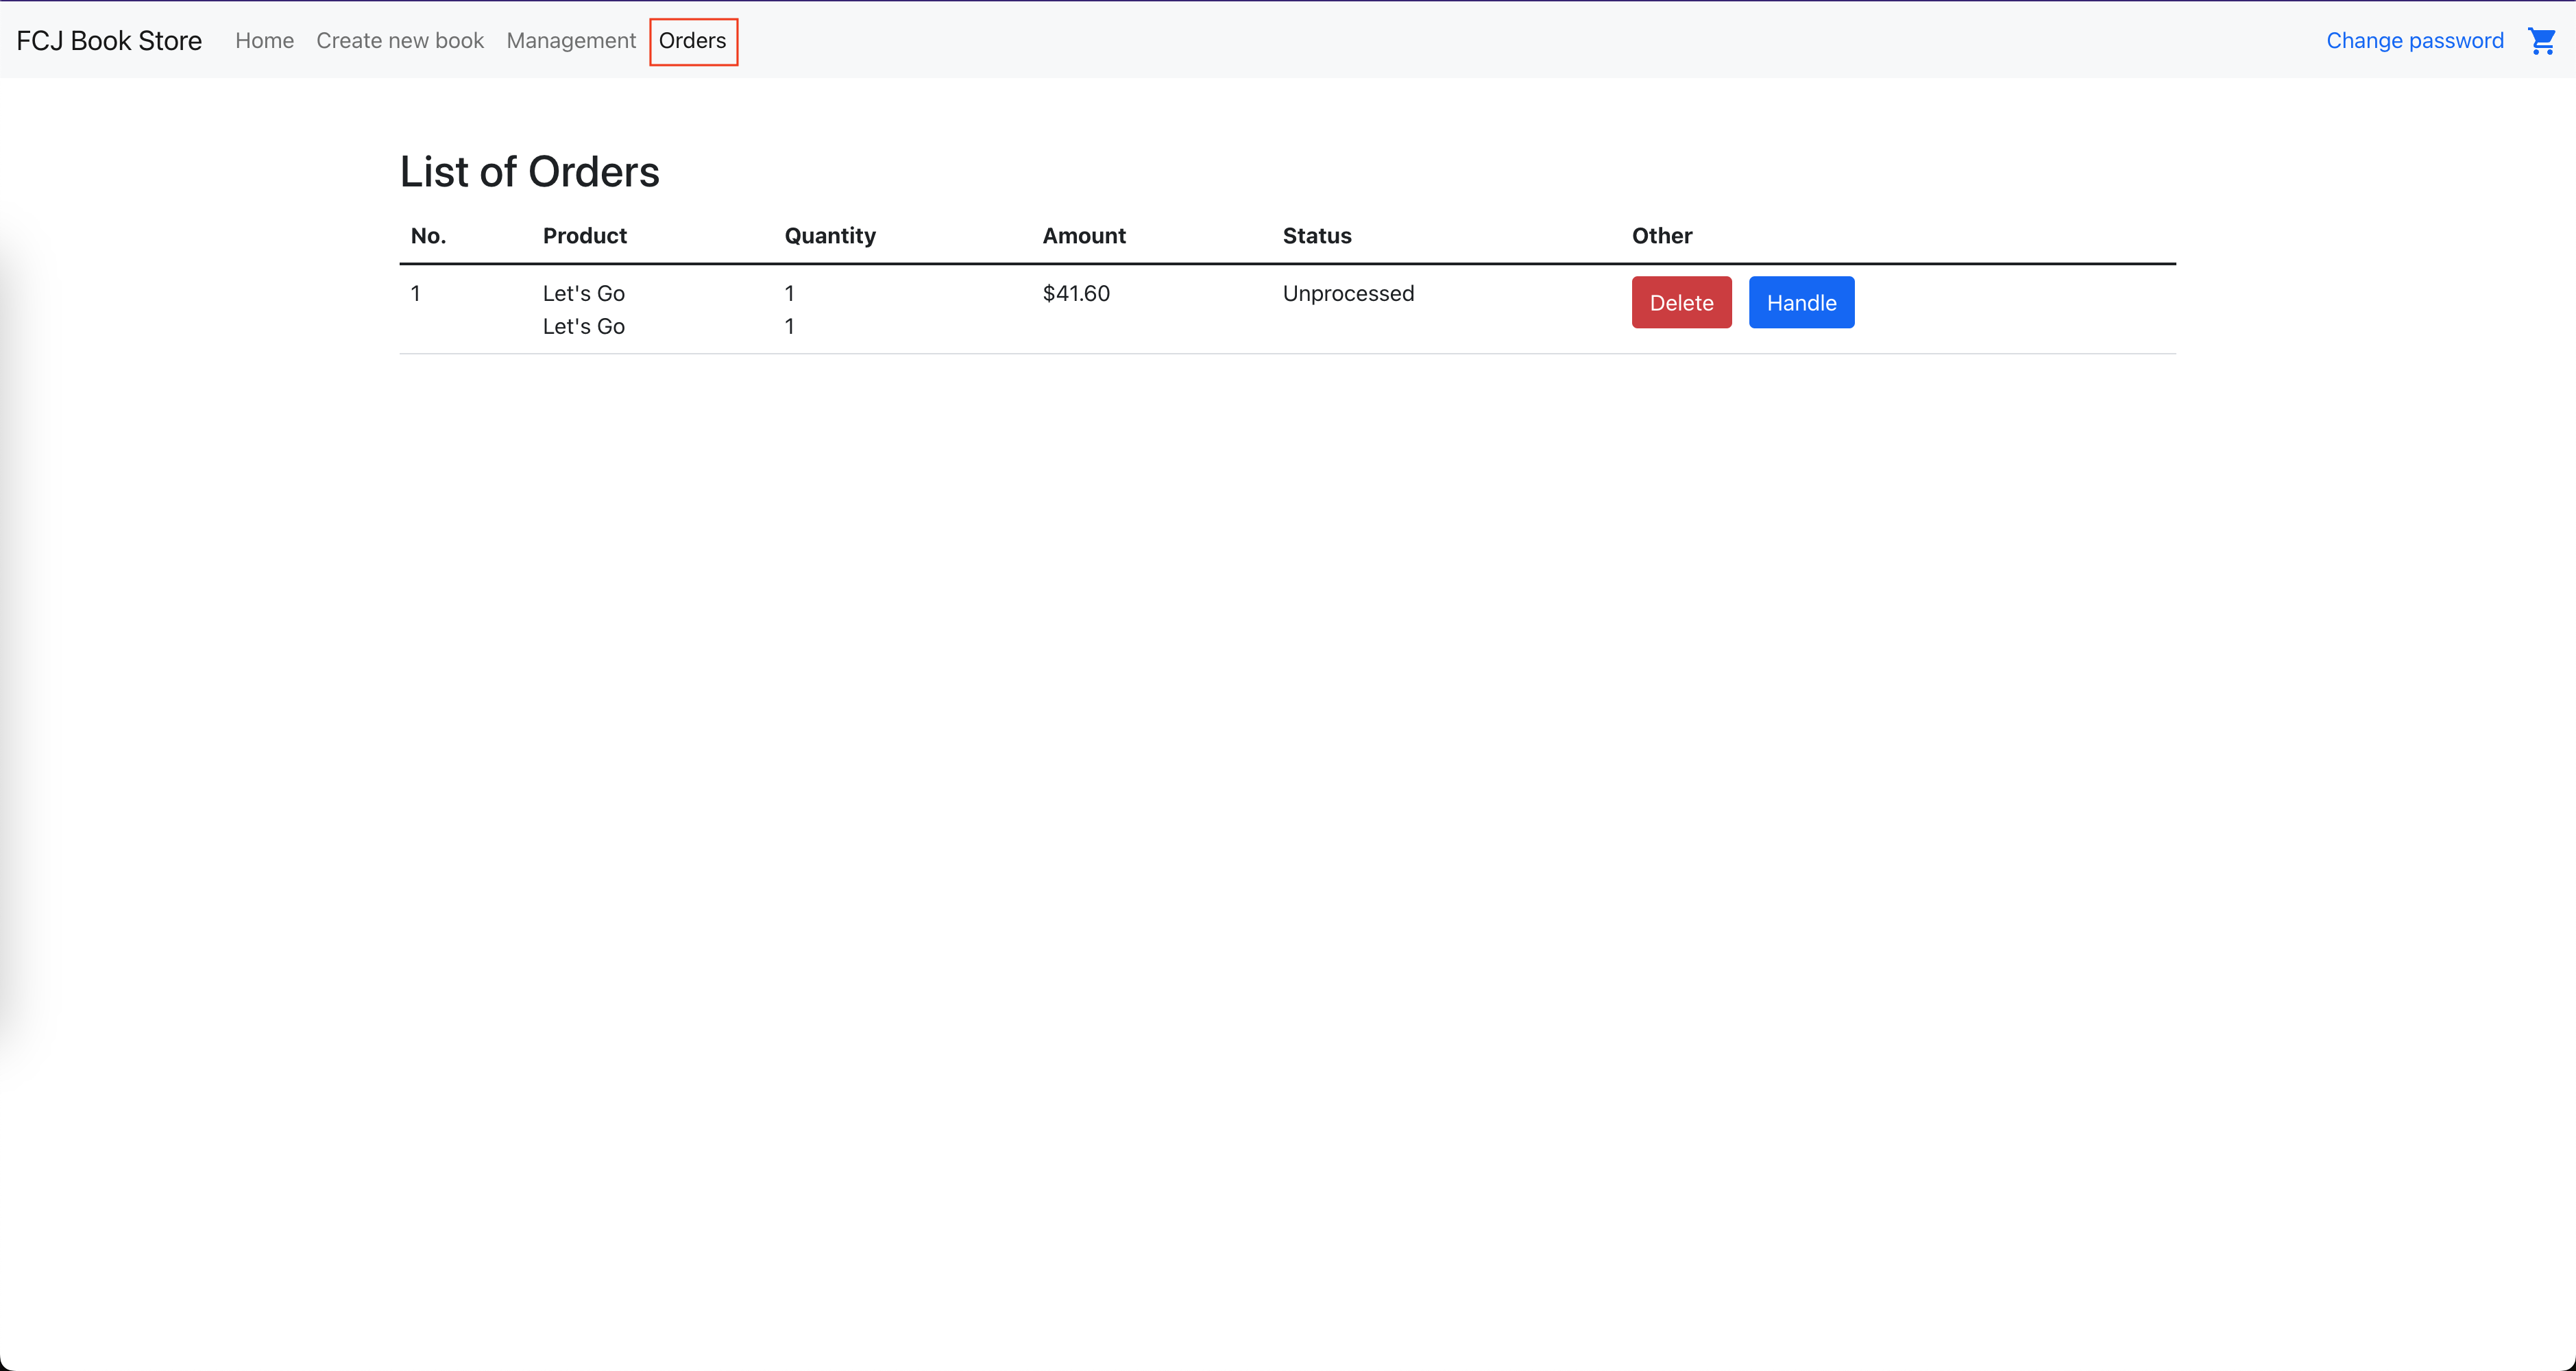
  1. Back to the application tab
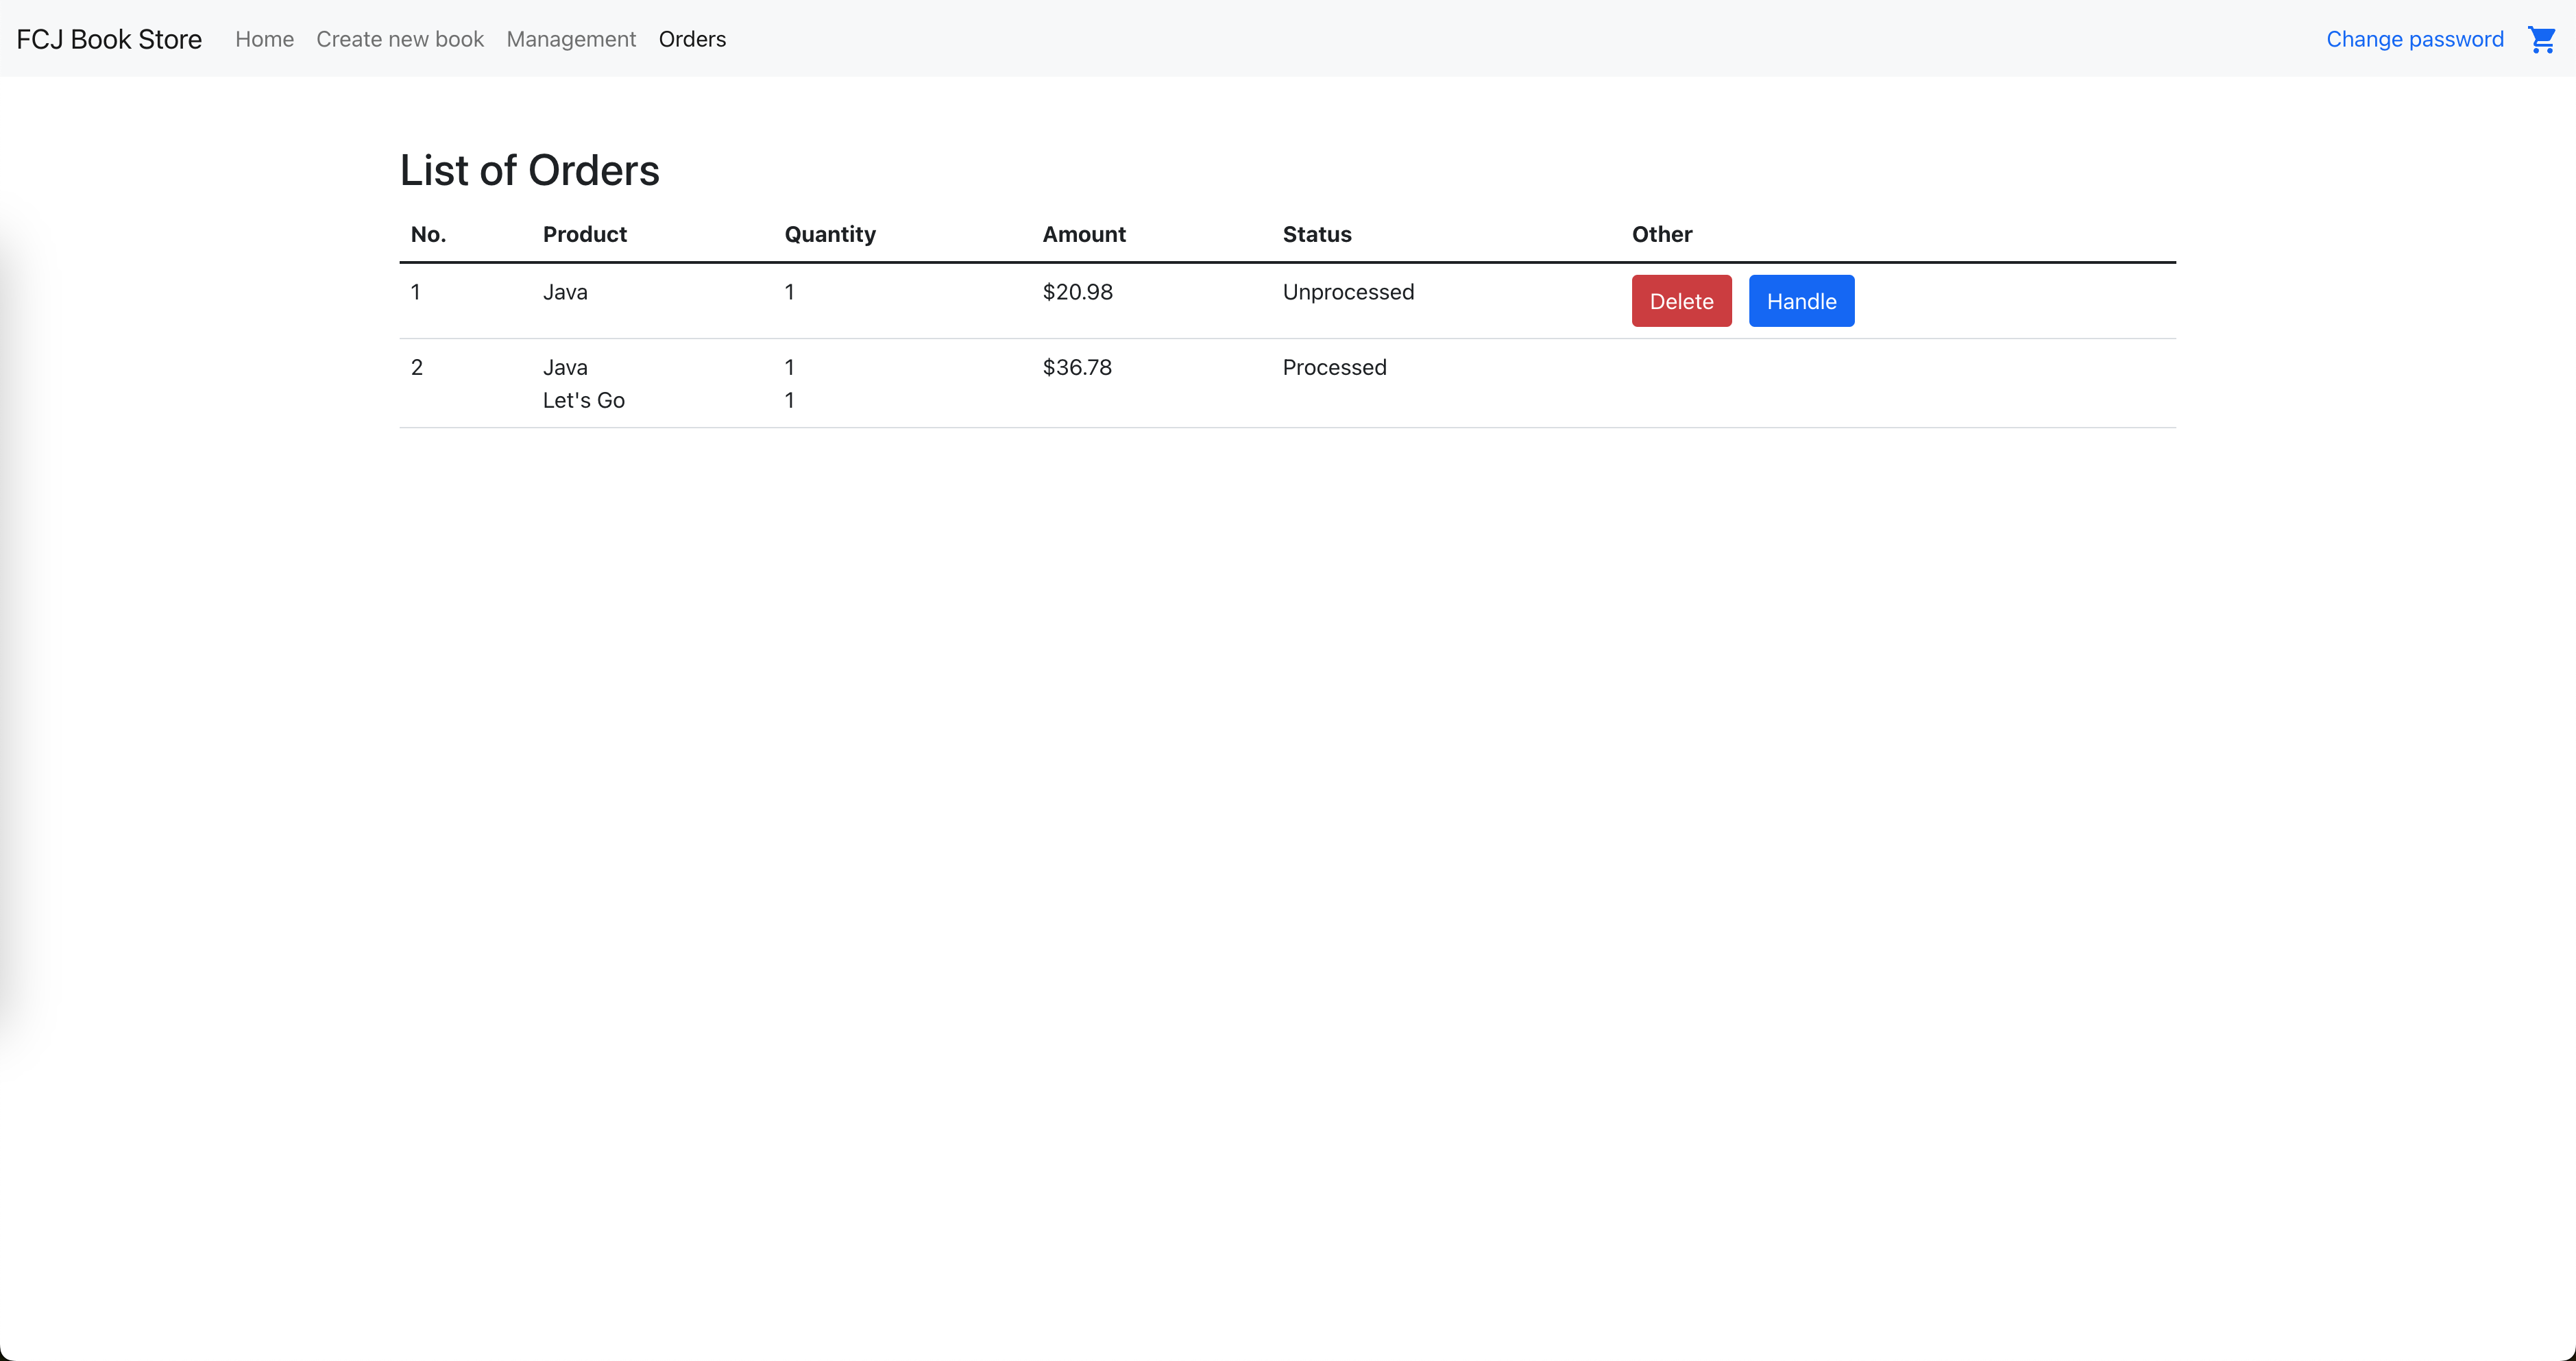
  • Click Orders, orders are displayed

CreateRecord

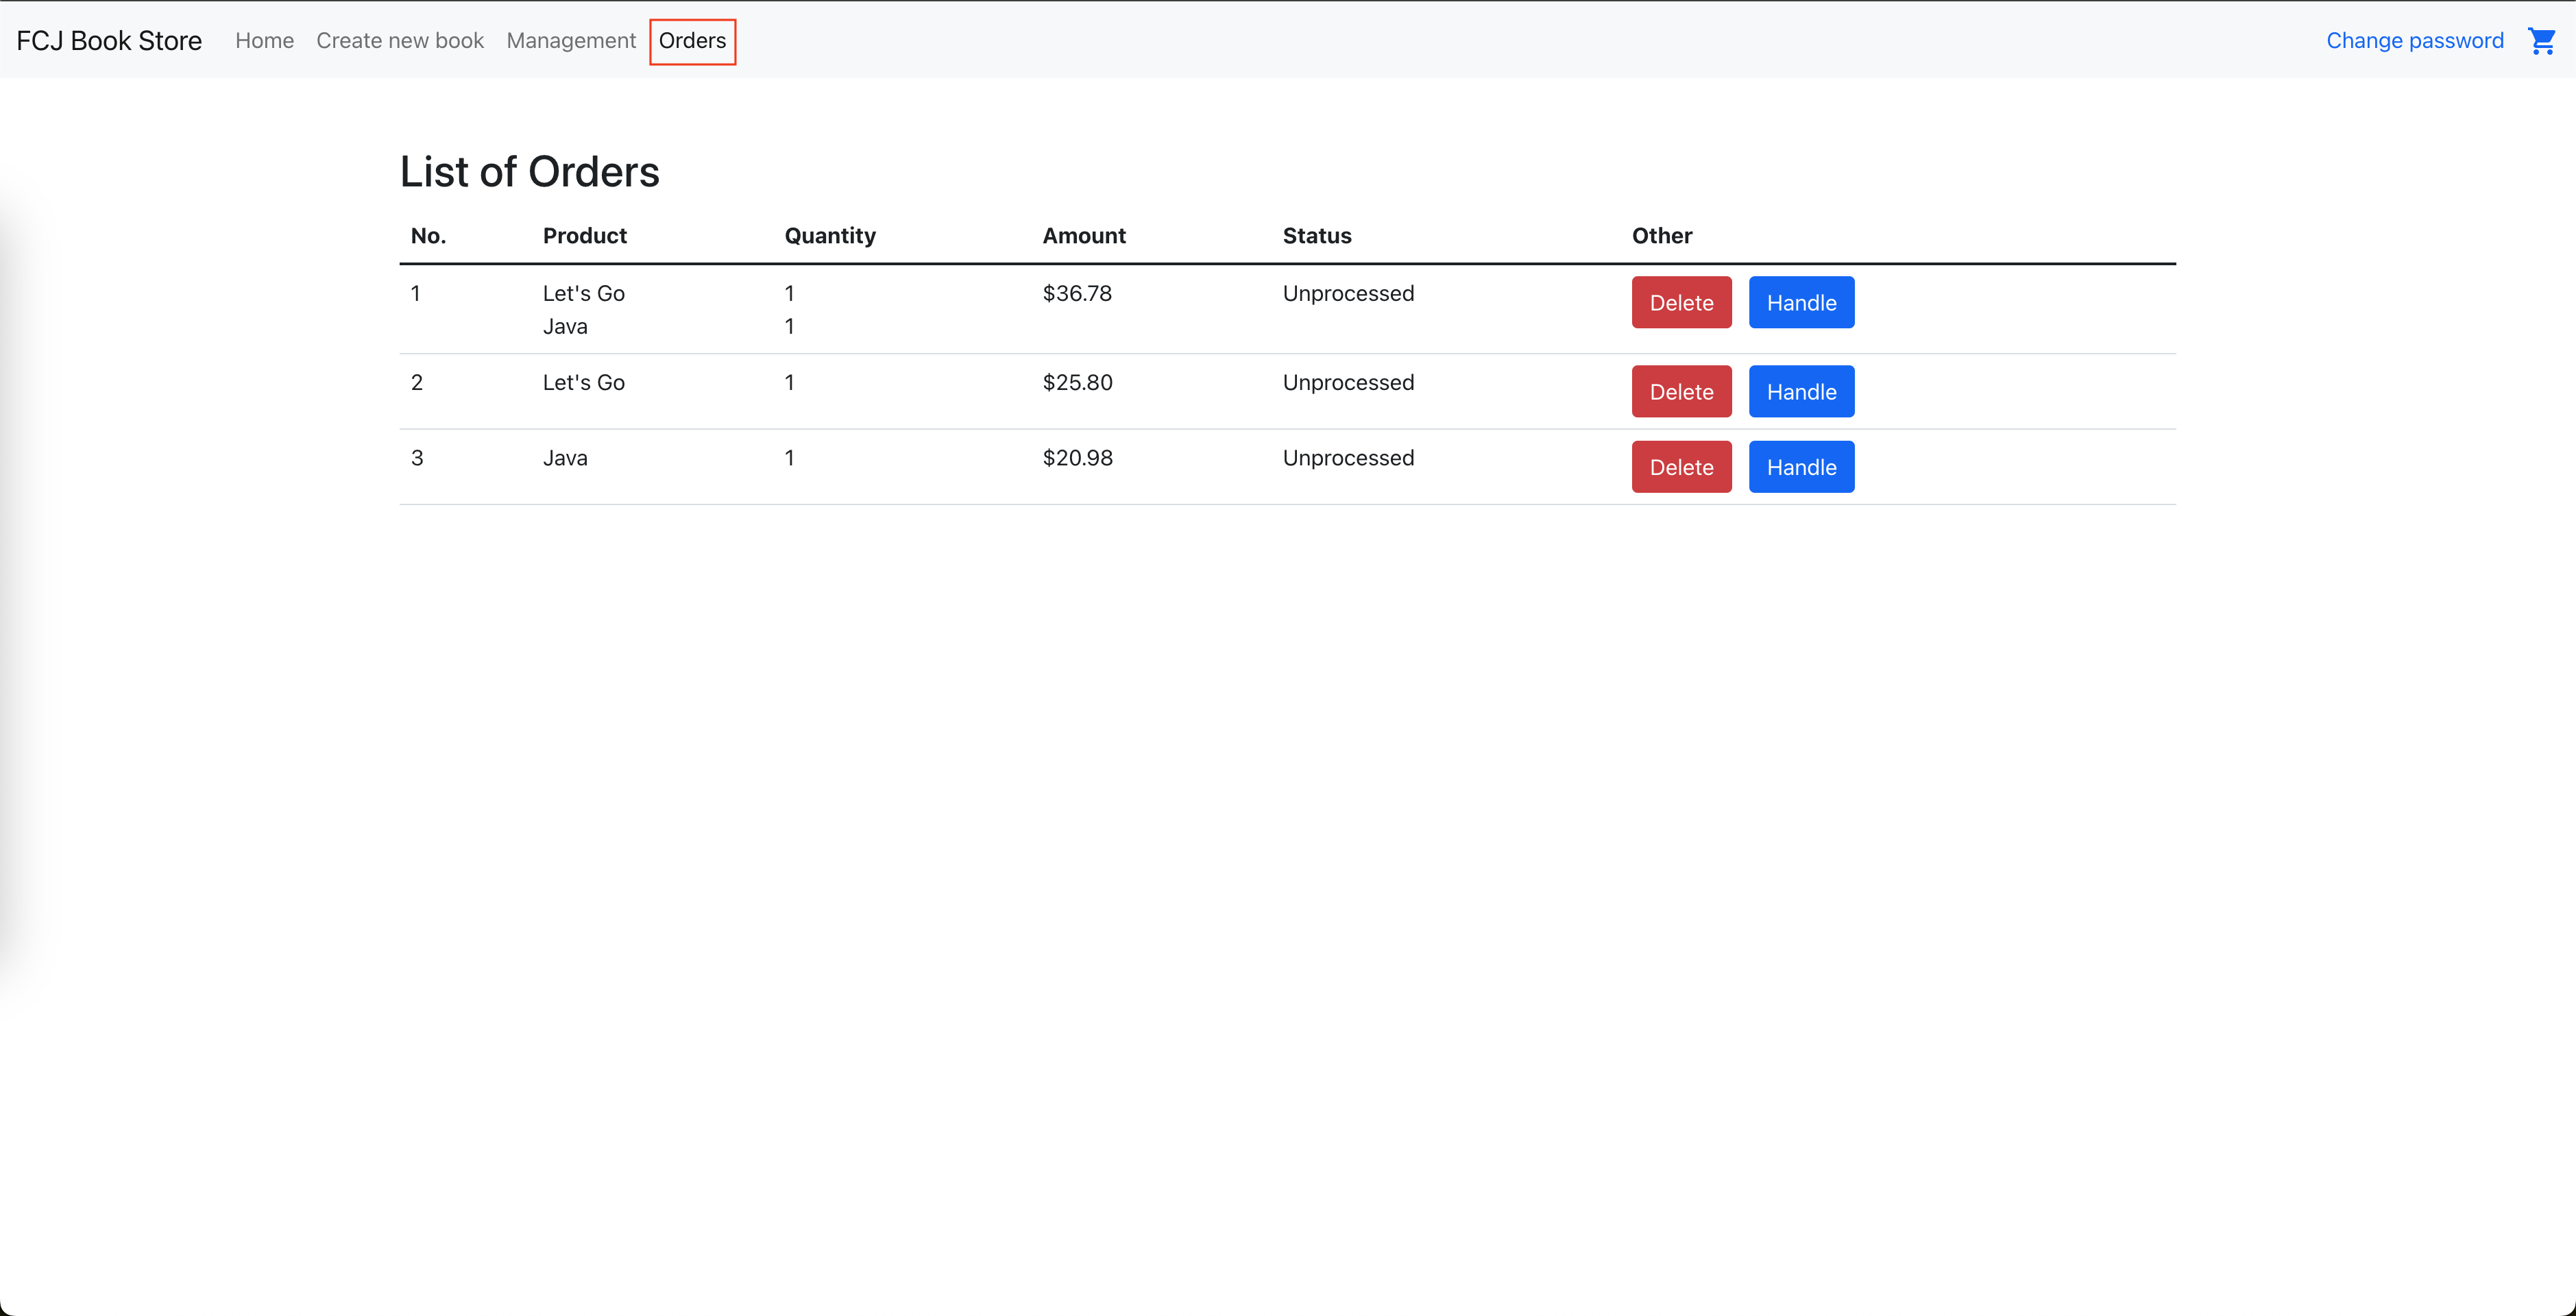
  1. Repeat steps 12 to 14 to add as some orders as you like
  2. Click Orders
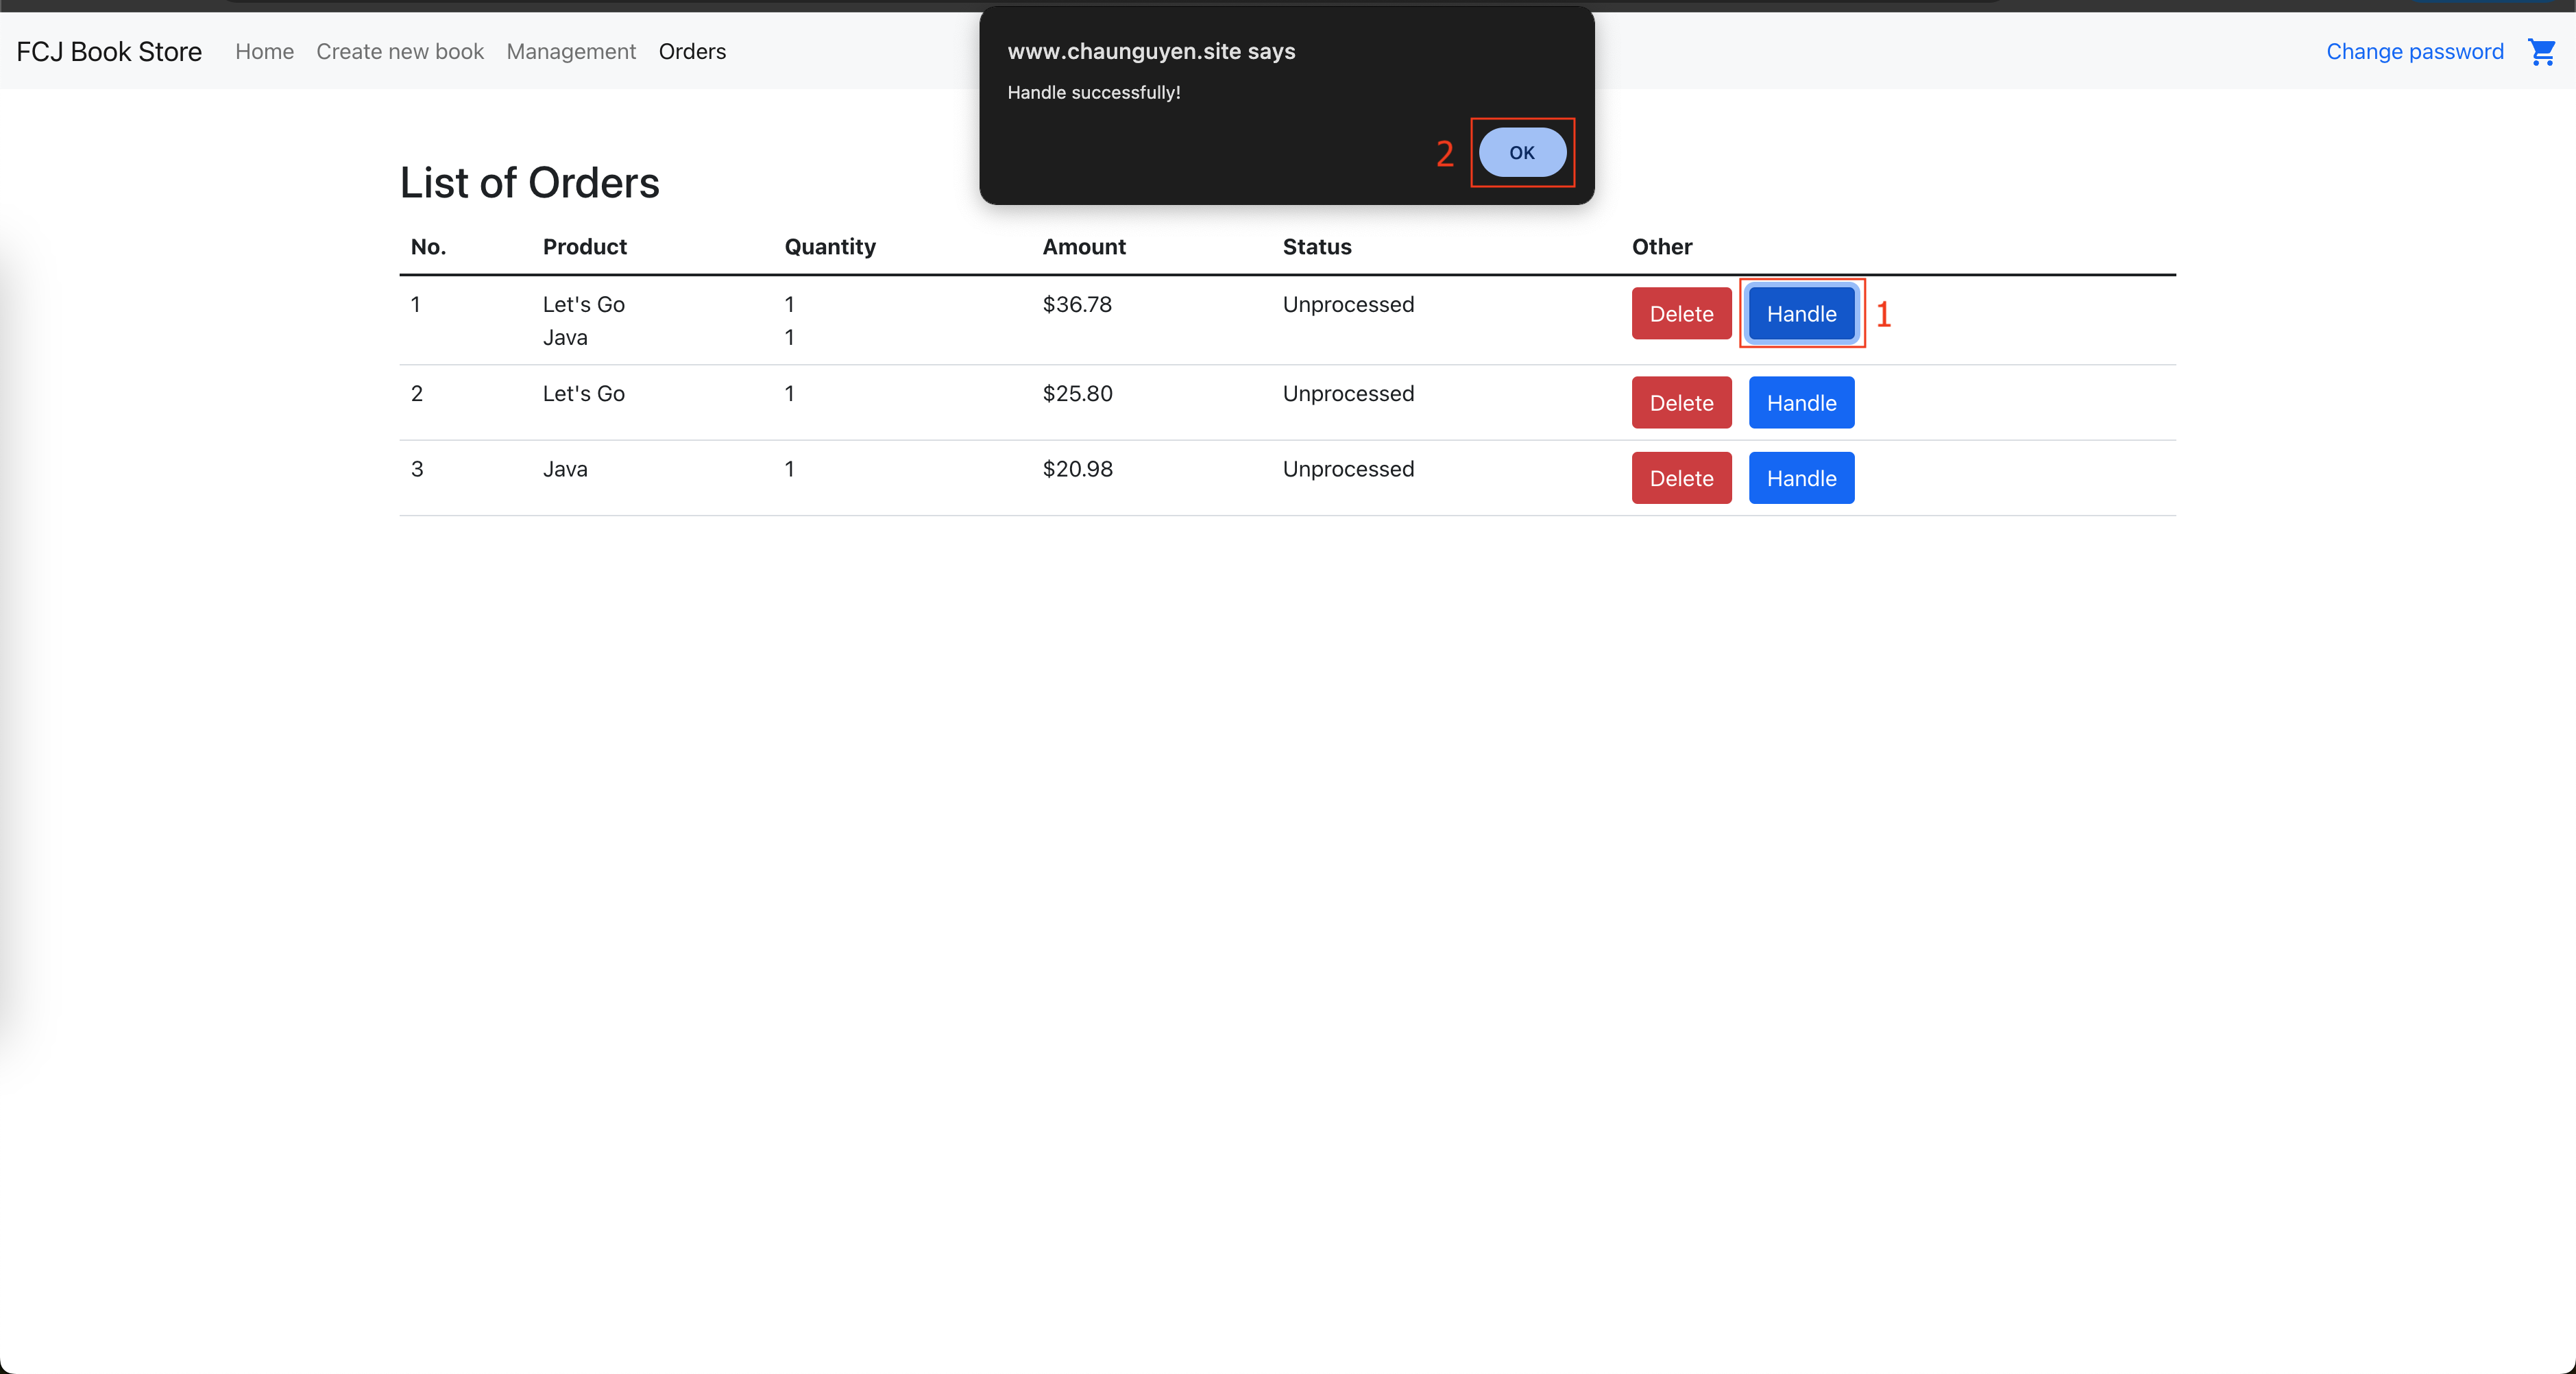
  • Click Handle

CreateRecord

  1. Click OK

CreateRecord

  1. The order has been processed, the status is changed to Processed and delete and processing buttons aren’t displayed
  • Click Delete
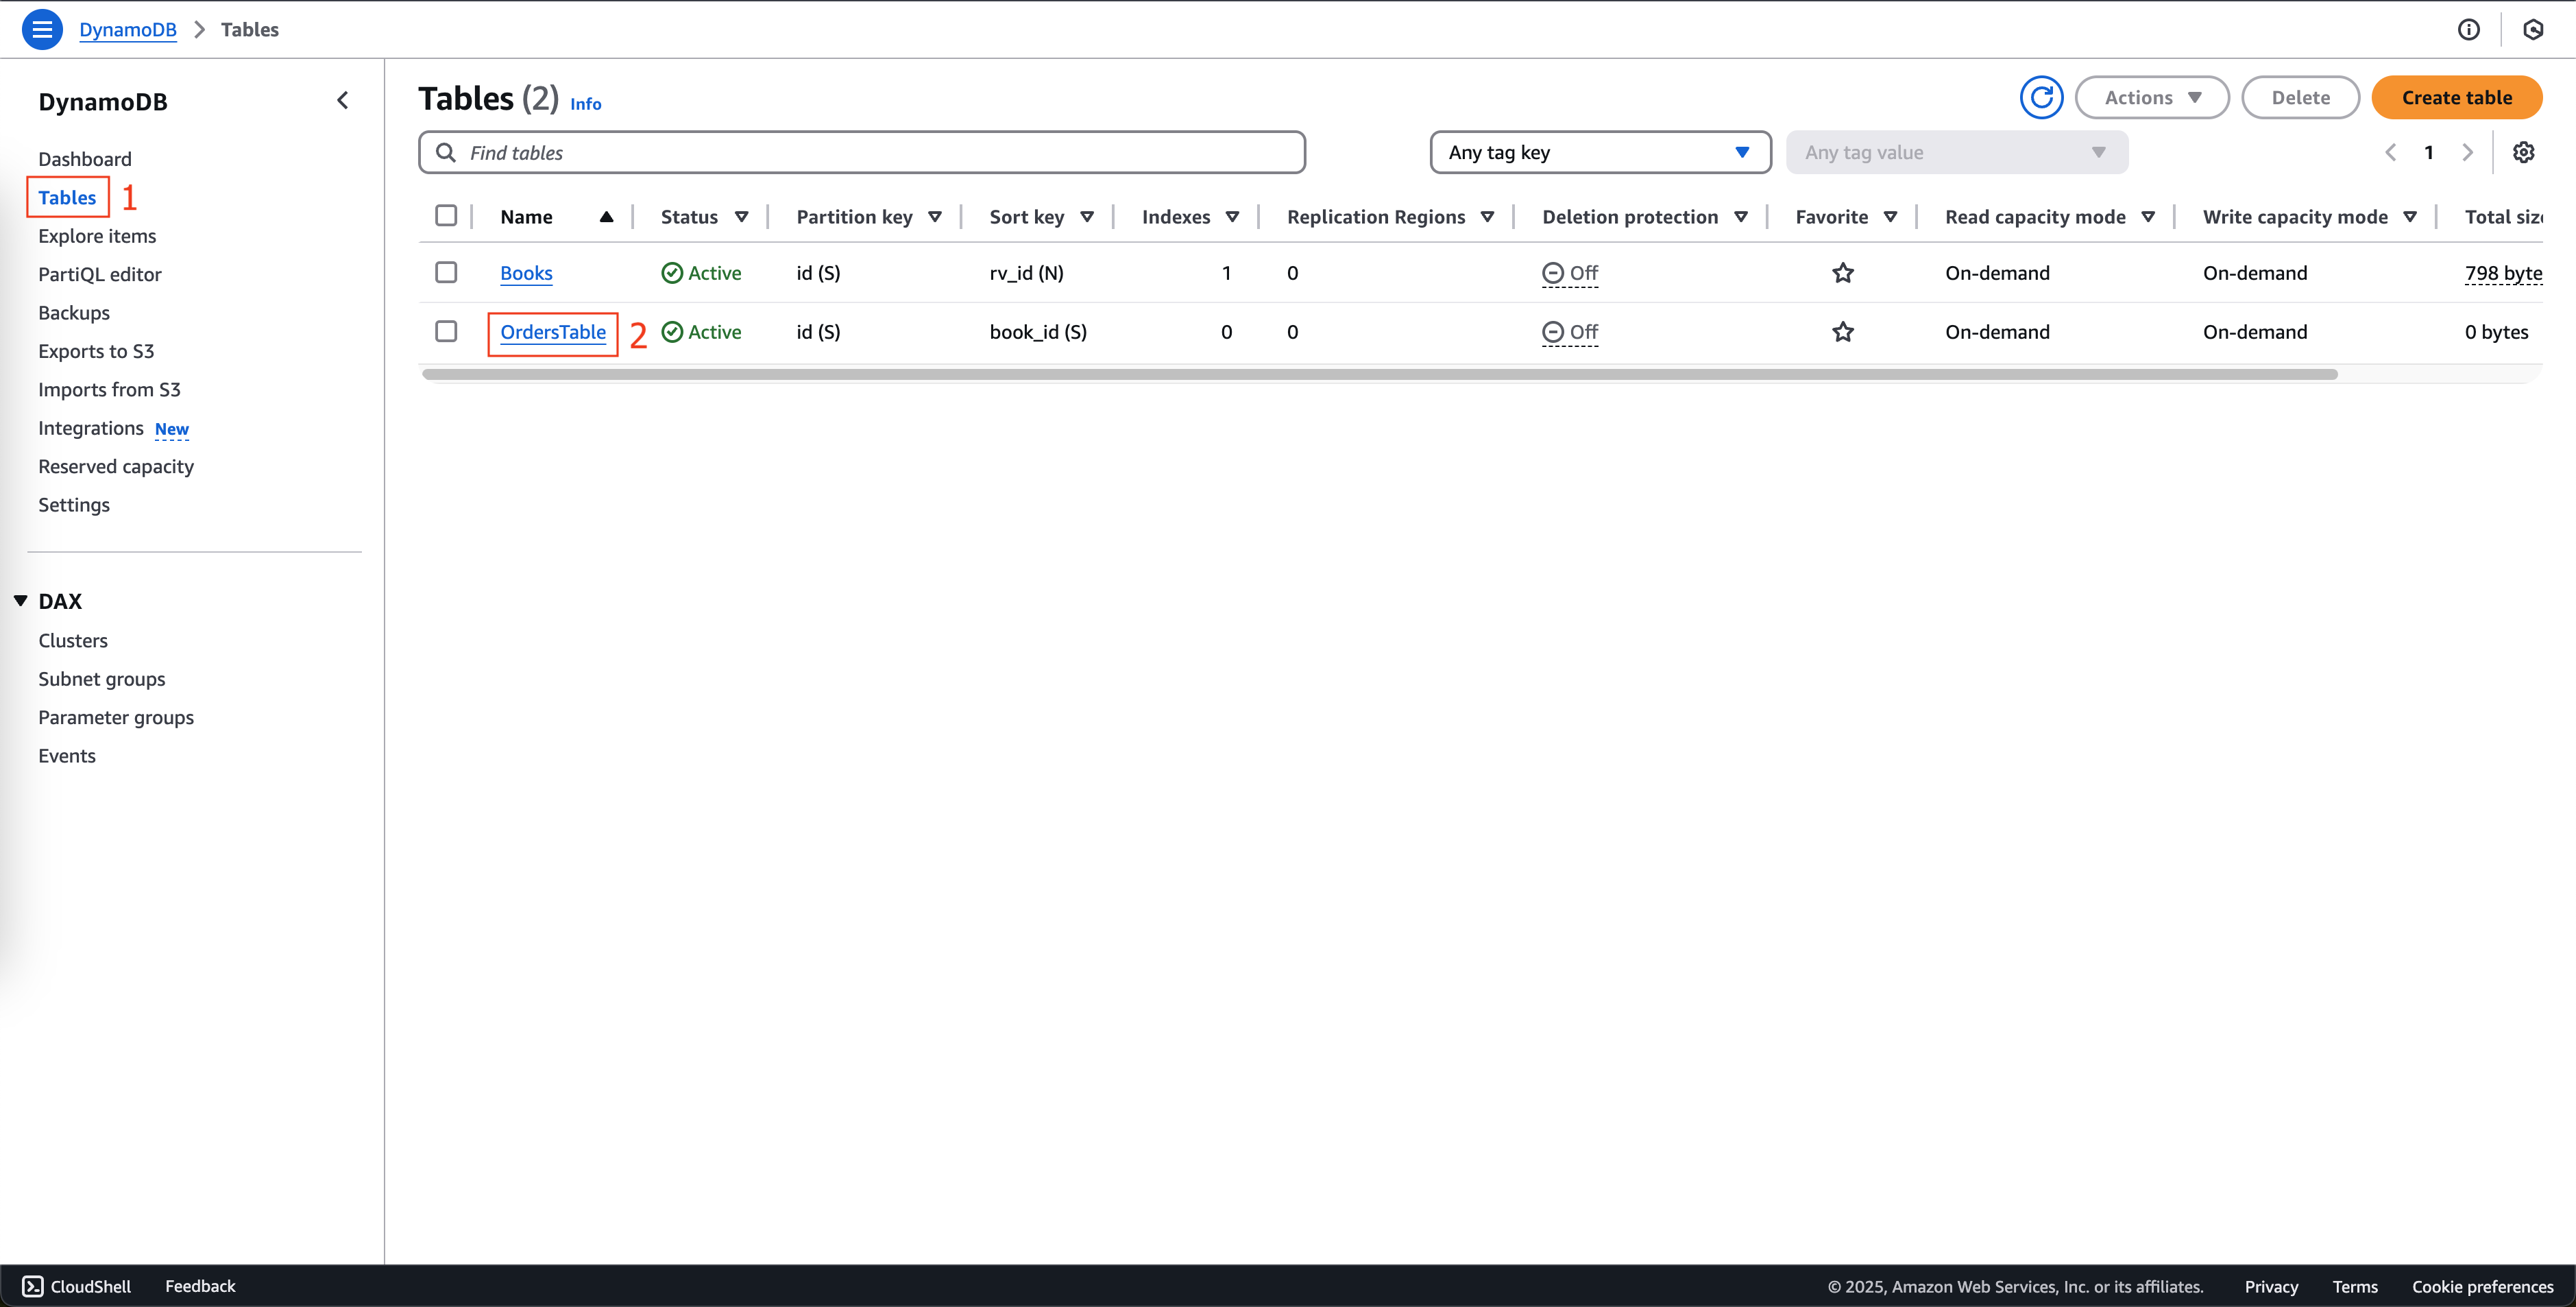
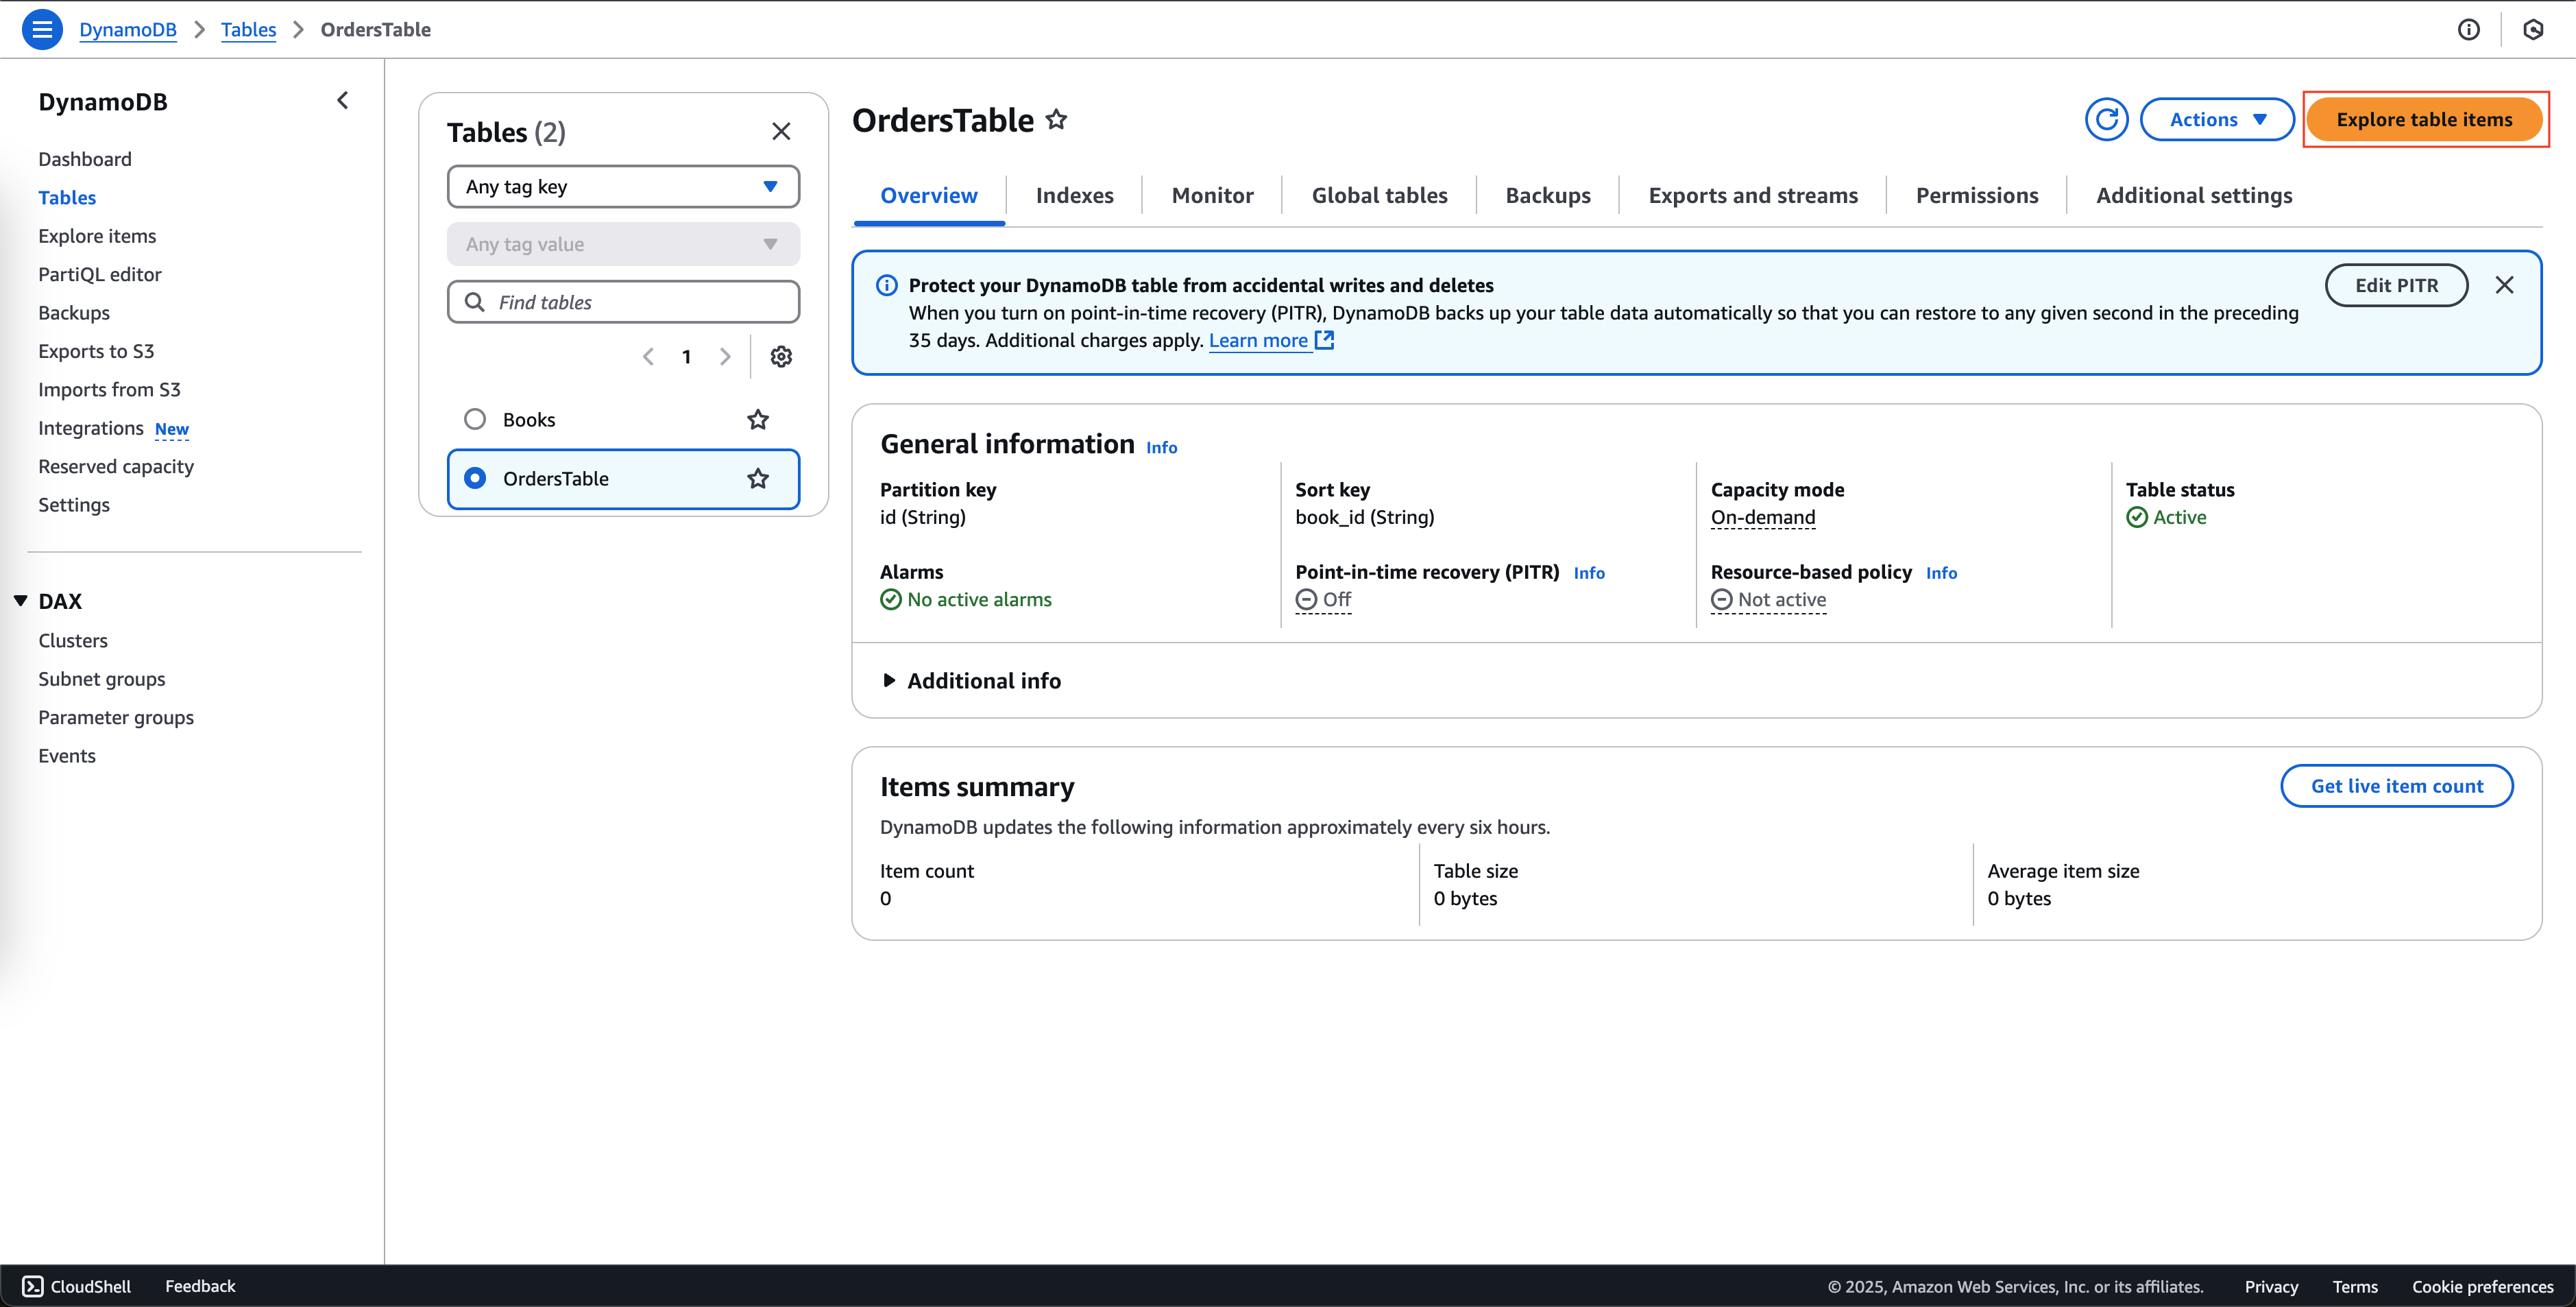
  1. Open Amazon DynamoDB console, Click Explore items on the left menu
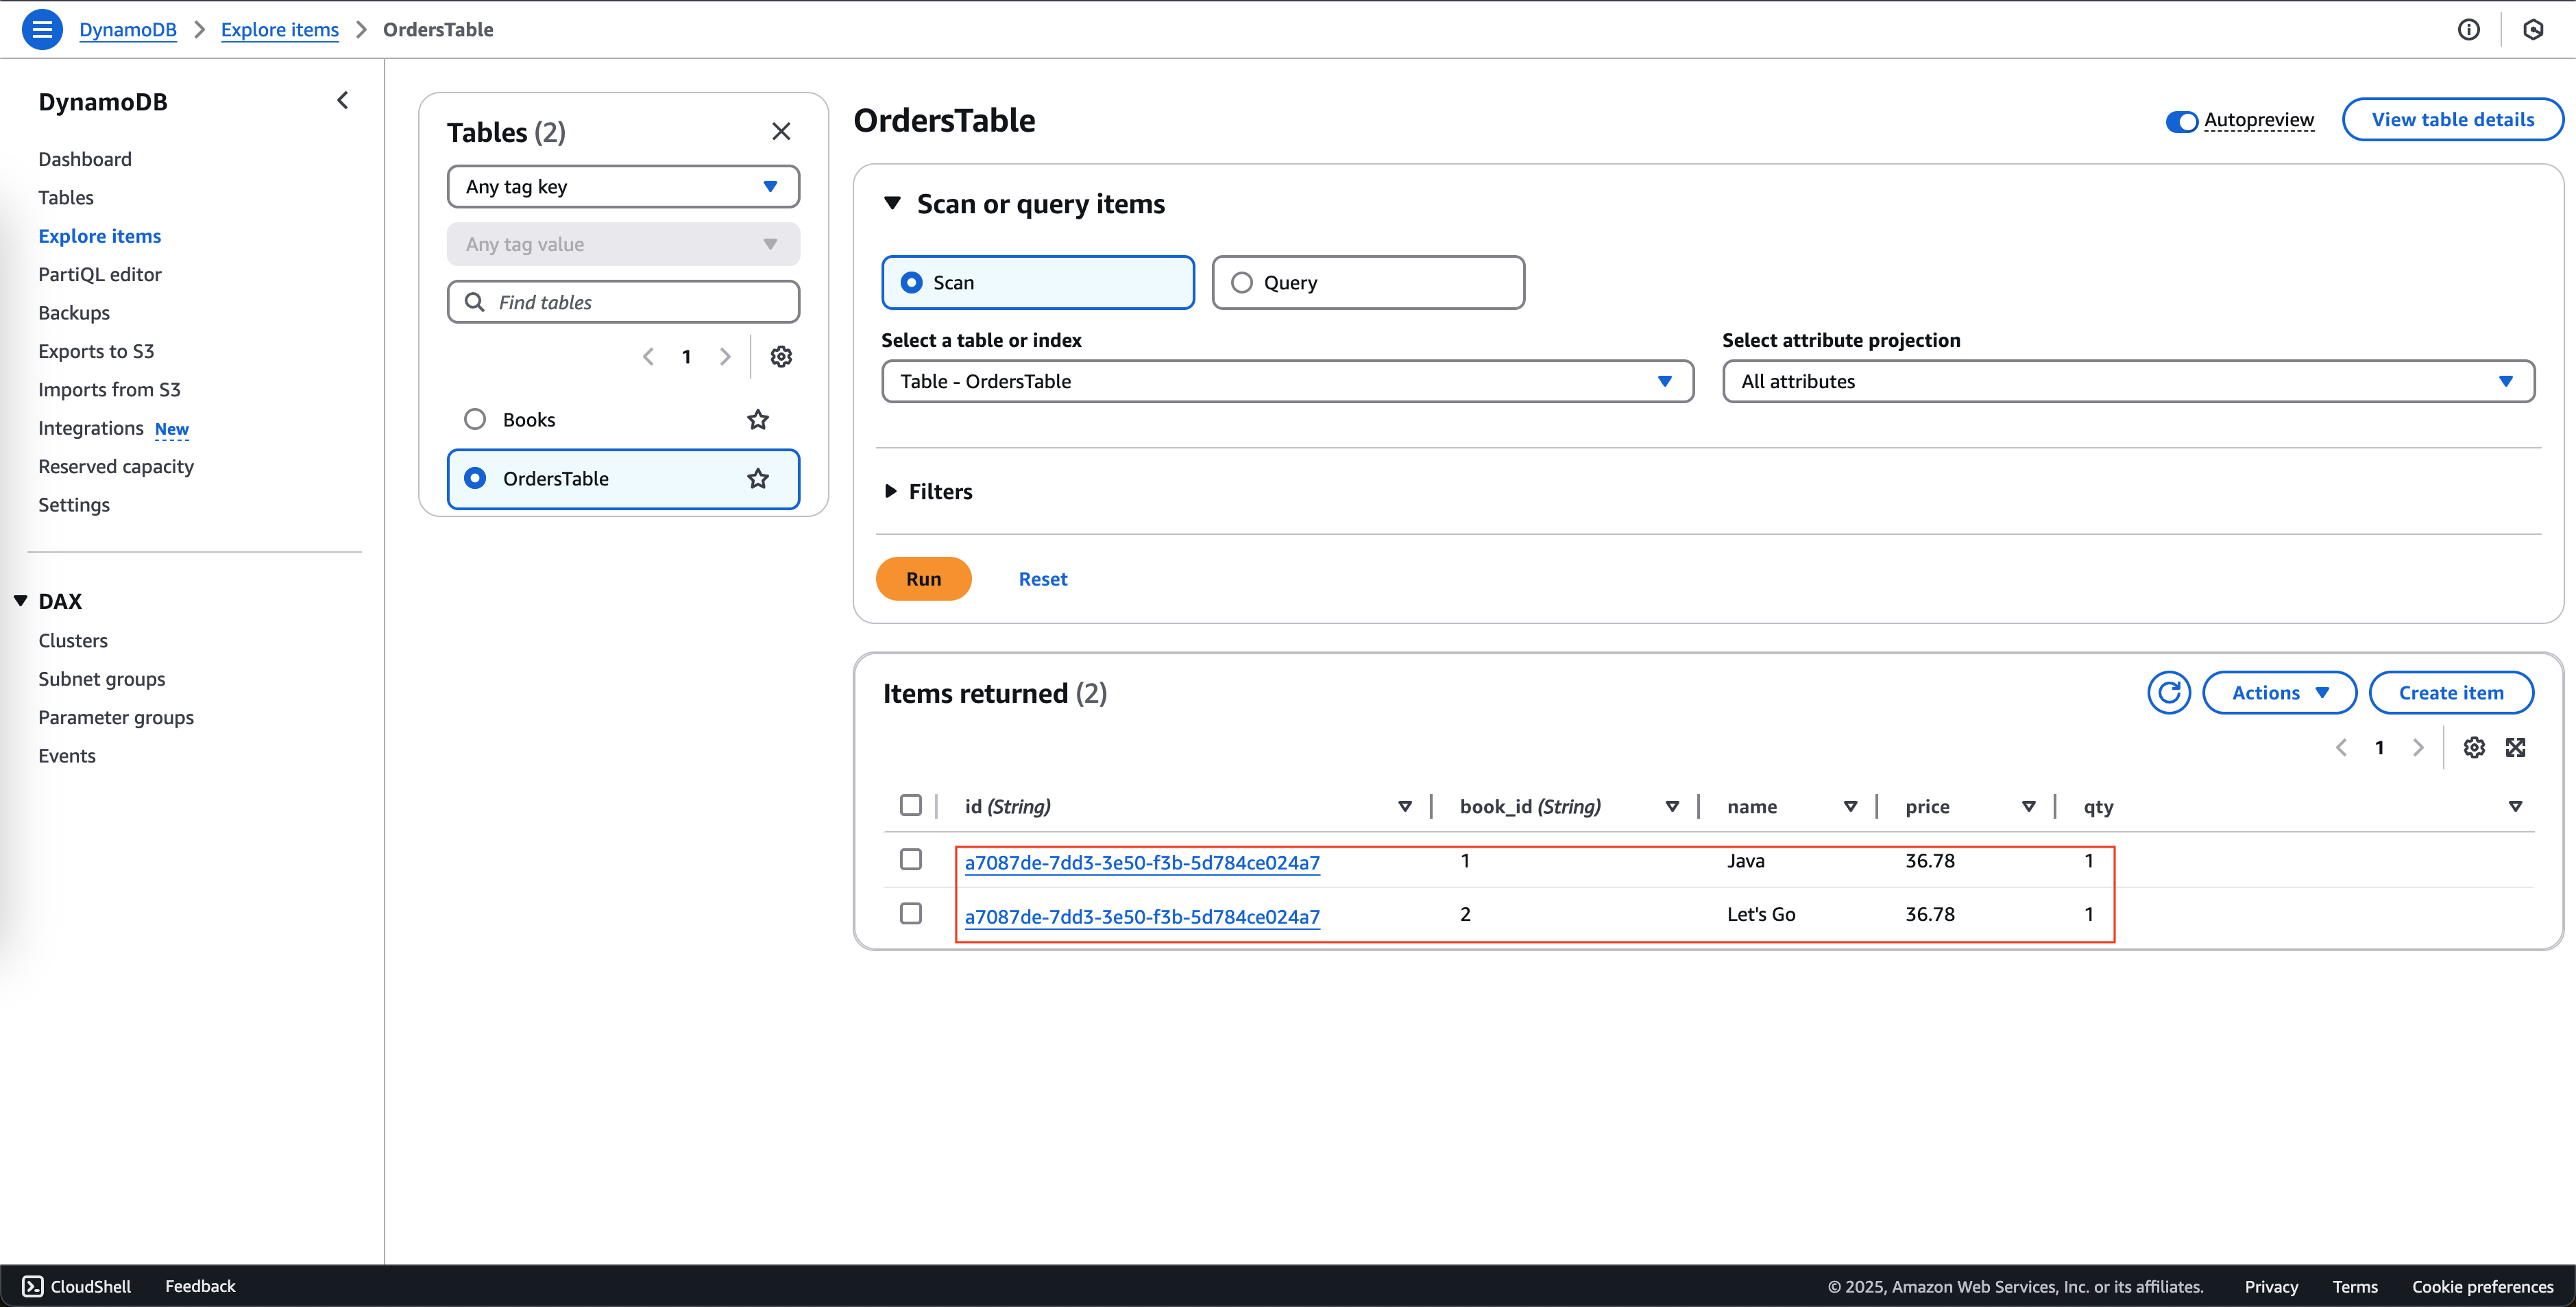
  • Select Orders, processed order data has been entered into the table

OrdersTableData

  1. Back to application tab
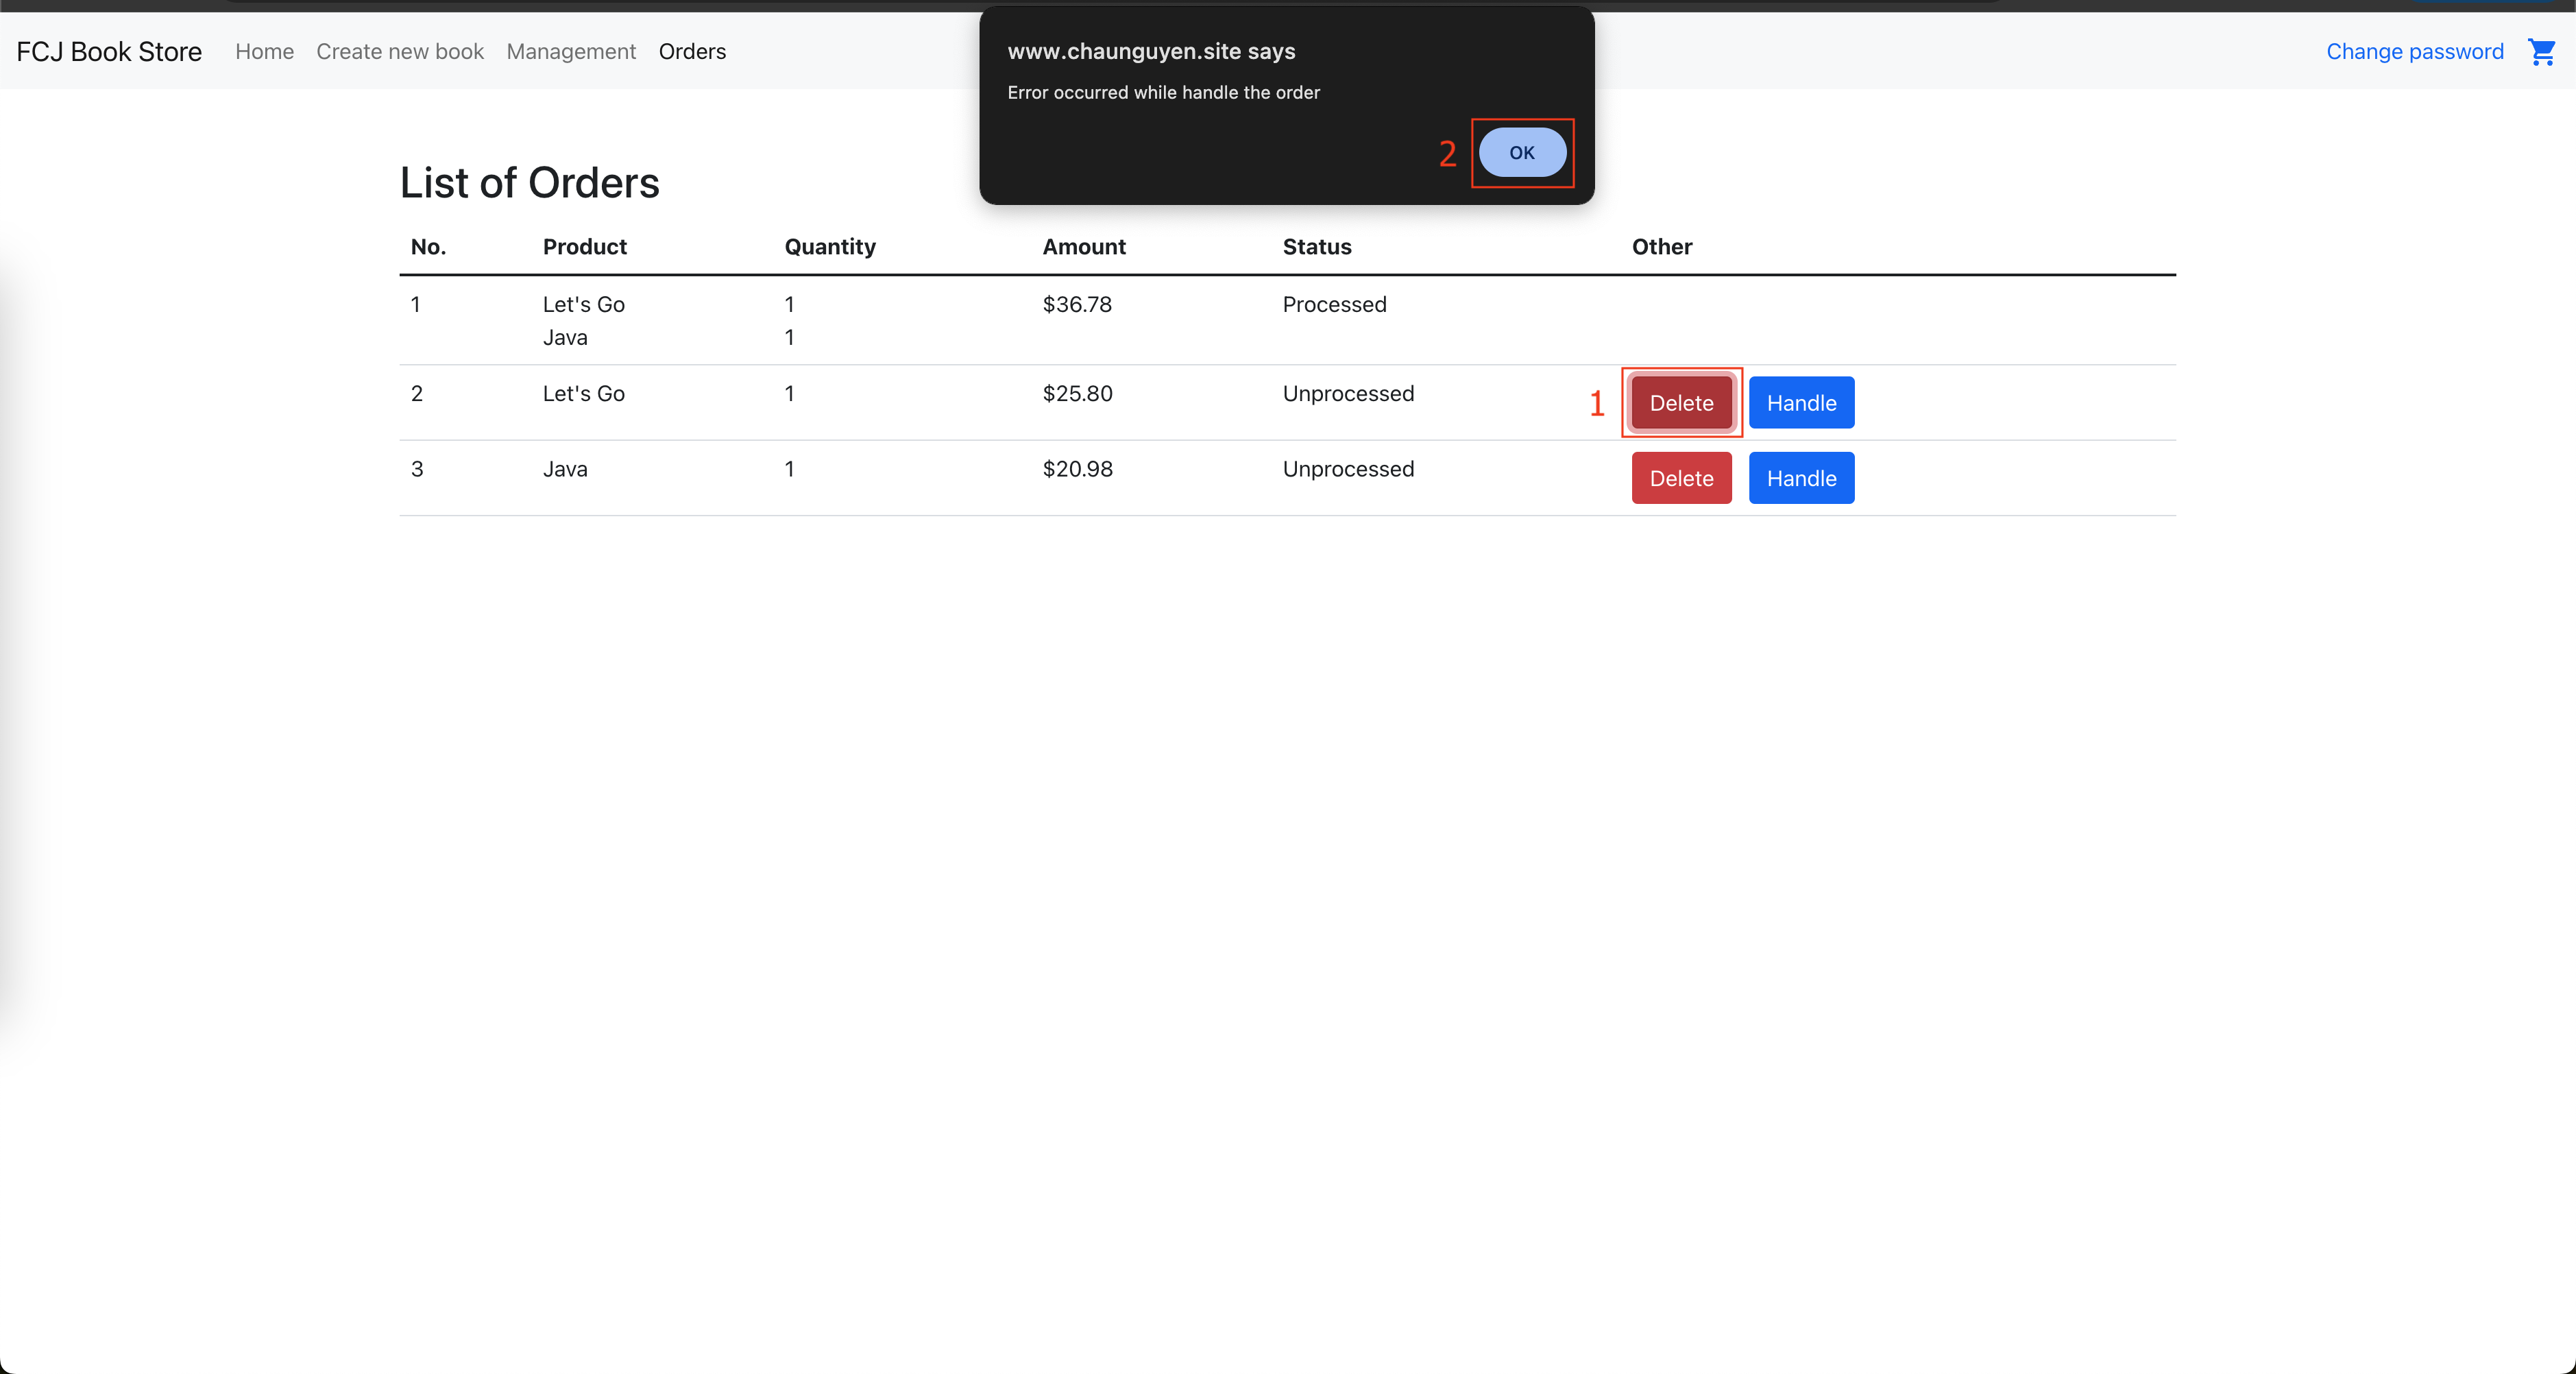
  • Click Delete

CreateRecord

  • Click OK

CreateRecord

  • Deleted orders are no longer displayed

CreateRecord

We have completed the workshop, already know how to work with Amazon SQS and Amazon SNS. The next workshop we will use CodePipeline to deploy the application.